Create textures, placing them and patterns
Here, I want to show what you need to do in order to create a texture from a photo, how to place that texture on an object and what you need to do in order to create patterns.
Find photos and place them
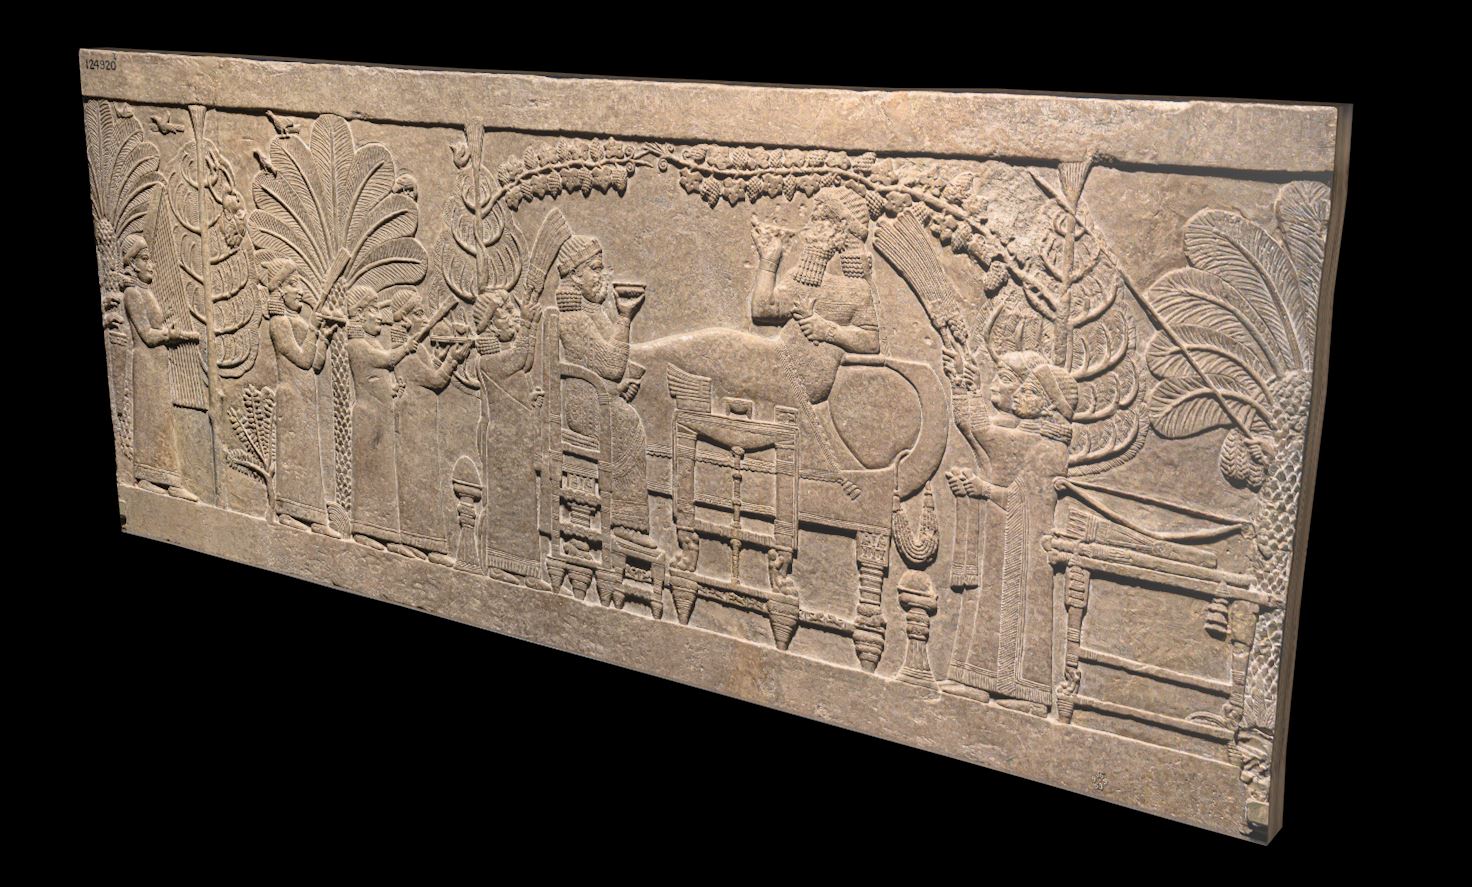
So let's say, we want to decorate a typical Assyrian bas-relief wall. You know, the usual thing to do. I will not recreate an actual Assyrian wall, but just take some reliefs and patterns from different locations to put them together. So let's start. On Wikipedia, we find a nice picture of Assurbanipal's Banquet Scene. Download the file and start a new Cinema4D project. We have two possibilities here and we will have a look on both.
Put the texture on an object with the same size

Let's say, we want to create the relief as an object, so a cube with the dimensions of the relief, that we can use and place where ever we want. So first, we create a cube and then a new texture. In the colour channel, we place the image from Wikipedia in the texture field. Don't forget to name the material. If you leave the material window open, we can now adjust the cube. If you have a look in the material window below the texture field, you'll find the dimensions of the image that we have placed. In my case, it is 7502 x 3064 pixel.

We can use these dimensions for our cube. So let's put 750,2cm in the Size X field, 306,4cm in the Size Y field and an arbitrary 20cm in the Size Z field. This way, our cube has the same exact dimensions as the texture that we have created. We now only need to drag the material onto our cube and give it a test render. It already looks good.

Here is a bonus: If you look closely, you see that the dimensions of the relief are not exactly rectangular, because pieces of the corners have broken away. If you like you can fix this and adjust your cube to the real dimensions of the image. For this, we first need to subdivide our cube. If you select the cube and have a look at the Attribute Manager, you'll find right beside the dimensions the segments. All are set to 1 by default. We want to change the SegmentX value to 15 and the SegmentY value to 8. After that, convert the relief to a editable object by pressing C. If you switch now to polygon mode, you'll see an already divided mesh.
Let's now switch to Front Viewing mode by hitting F4. We also want to see our texture, so we also hit N~B. The texture itself does not render very crisp in the Viewport. So let's open up the material by double-clicking and then turn to the Editor tab. Change the Texture Preview Size from Default to 2048x2048.

If we now switch to point mode to adjust the outer points to the dimensions of our cube, you will see, that we deform the texture. That is not what we want. So we first have to change the texture projection. For that, we select the texture tag right beside our object in the Objects Manager. There we find the Projection in the Attributes Manager, which is set to UVW Mapping. We want to change that to Cubic. The texture does not fit onto our cube anymore, but we can fix that. By right-clicking the texture tag in the Objects Manager, we can select the option Fit to Object. Everything should look normal now. If we now try to move the points of our cube, the texture will not be deformed anymore. We can now go around our cube and move the outer points inside, so that the grey areas vanish. If you need more points, do a subdivision or cut.

Create your own materials
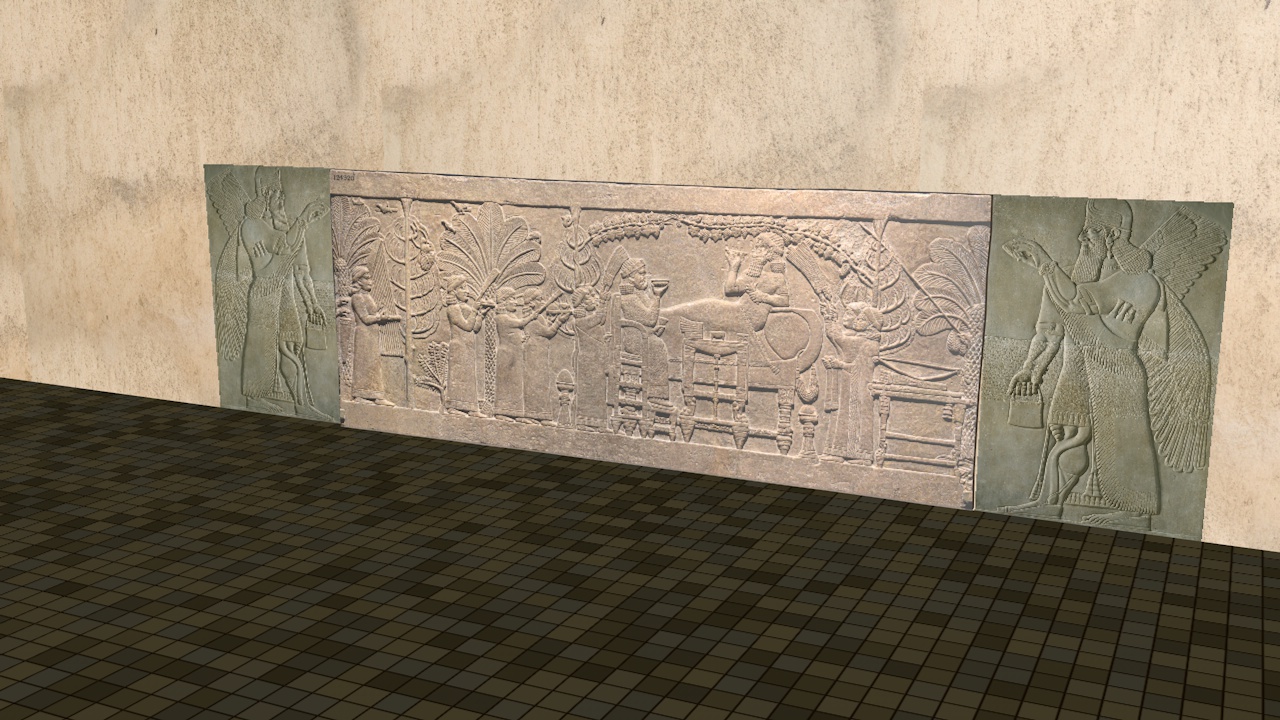
So let's say, we want to create a whole wall of textures. The middle one, we leave as it is. The next step would be to create a wall or better a room, where to place the bas-relief. We simply create a Plane-object and rotate, scale and move it behind our relief and then create a Floor-object as a... well a floor. We need to move up the relief and plane, so that everything is placed on the floor. We now want to texture the Plane-object as the background of the relief.

You can download this material and create a new material of it in the Material Manager. Same as before. Put it onto the wall and change the Projection Type to Cubic. The texture might be a bit repetitive, but we can change the size of the texture ourselves. Select the Plane-object as well as the Texture Tag of the same object. On the left side, we select the Texture-button (see screenshot) and the Scale Tool (T). We can now scale the texture to our liking. I personally scaled it up a notch.
Make sure, that you change back into Object Mode before proceeding. For the floor, we will create our own texture.
Creating patterns

We create a new material by double-clicking in the Material-Manager. When we open up the window, we turn off Reflectance and the go into our Colour-Channel. Left besides the Texture-field is a small arrow pointing down. When we press it, a small menu pops up. We select Surfaces and then Tiles. You should see a reddish-grey checkerboard style texture. Apply it to the floor. As you can see, the floor looks strange, but we can fix that. In the material window, click on the Tiles-button in the Texture-field. Here you can set the colours of the tiles and grout. Try to find some earthy tones and make sure to check the Randomize Colour box. Turn down the Bevel Width to 5%. Do a render to see the result. You have made a very simple tile texture.
Placing textures through projection

Let's say, we want to put some specific textures beside the relief. We could of course again create a box and put the texture on top, or we could place it directly onto the wall, like a painting. For this, find a suitable texture and insert it into the Material Manager. Lets just put it on the wall for now and see what happens. What happens is, that the wall texture, that we positioned there previously, gets "overwritten" by the new texture. In my case, the new texture is even displaced. We can change that for now by changing the Projection Type from UVW to Cubic. We still can't see our original wall texture, but instead the new texture over and over again.
If you have a look in the Attributes-Manager when selecting the wall object as well as the new texture tag, you'll see a small checkmark on the Tile option. remove that. Suddenly, we have our texture only once and only need to place and scale it. To do that we change again into the Texture mode on the left side. You can now use the Move and Scale tool to position your extra texture on top of the wall. Also: if you use Flat Projection instead of Cubic, you can also mirror textures, like shown here on the right side.

