🎨 Color and Lens Correction (Adobe)
Post-processing your photos is an important step in creating solid documentation. The two most important steps are white balance and lens distortion. Depending on your equipment, you may also want to create a colour profile or adjust the exposure. Every situation is different, and with different possibilities for lighting conditions, the correct colouring of your subjects will be distorted. A white balance can fix this, as long as you have a colour chart or greyscale card with your photos. We also want to compensate for lens distortion, as any setup can produce slightly distorted photos.
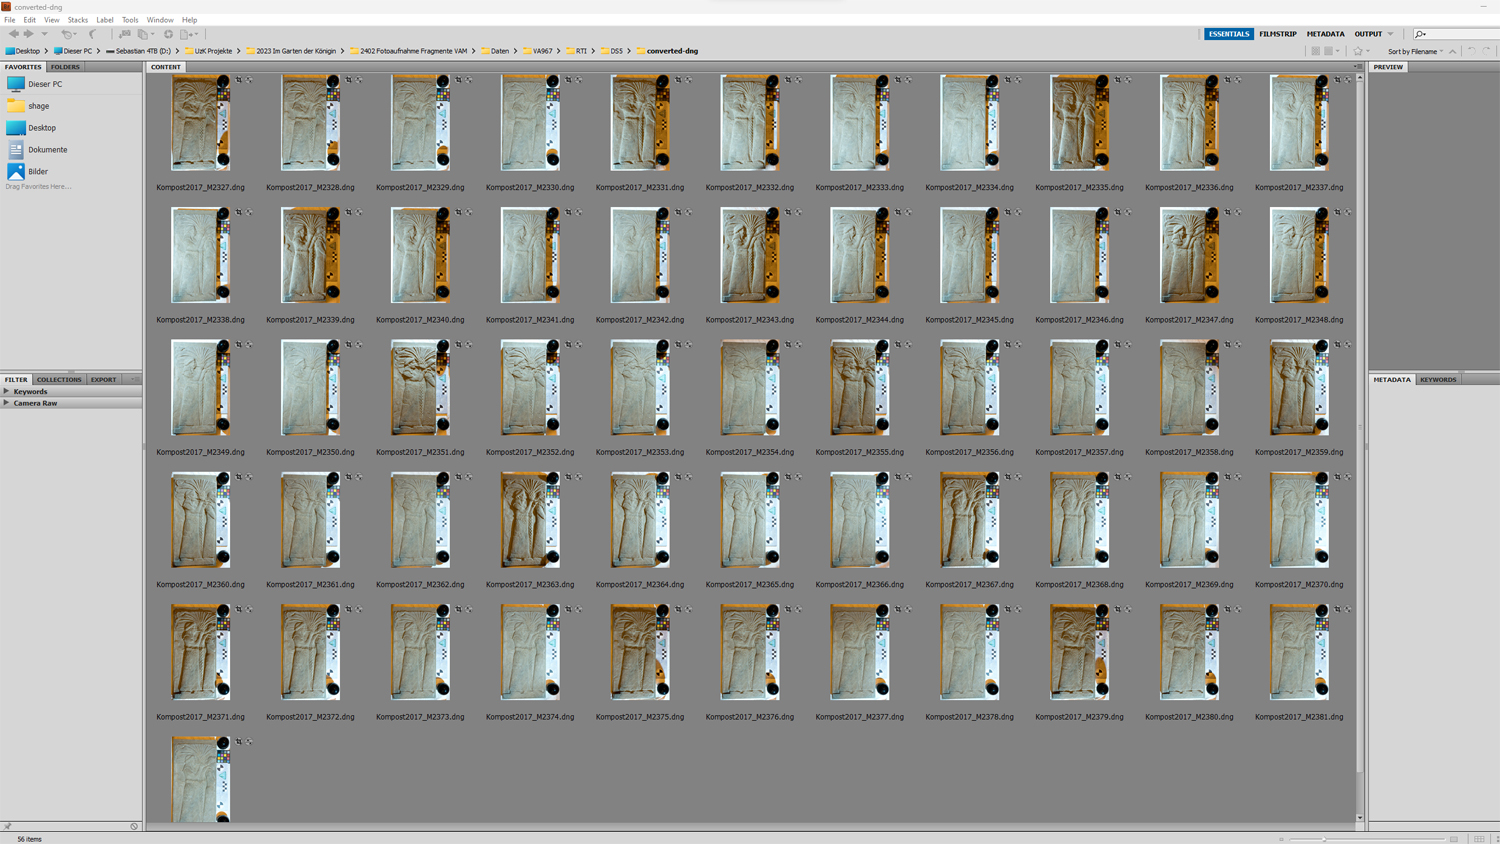
But first things first. If you are using Adobe Suite, the easiest way to open all the images in a set in Camera RAW is through Adobe Bridge. Simply open the software and navigate to the folder where you have saved your RAW images. Once you have found your folder, select all the images either by pressing CTRL+A or by clicking on the first image and then holding SHIFT and clicking on the last image. When all the images are selected, right click on them and select Open in Camera Raw... . This will open the entire dataset in the Camera Raw application, where you can post-process the images as described below.
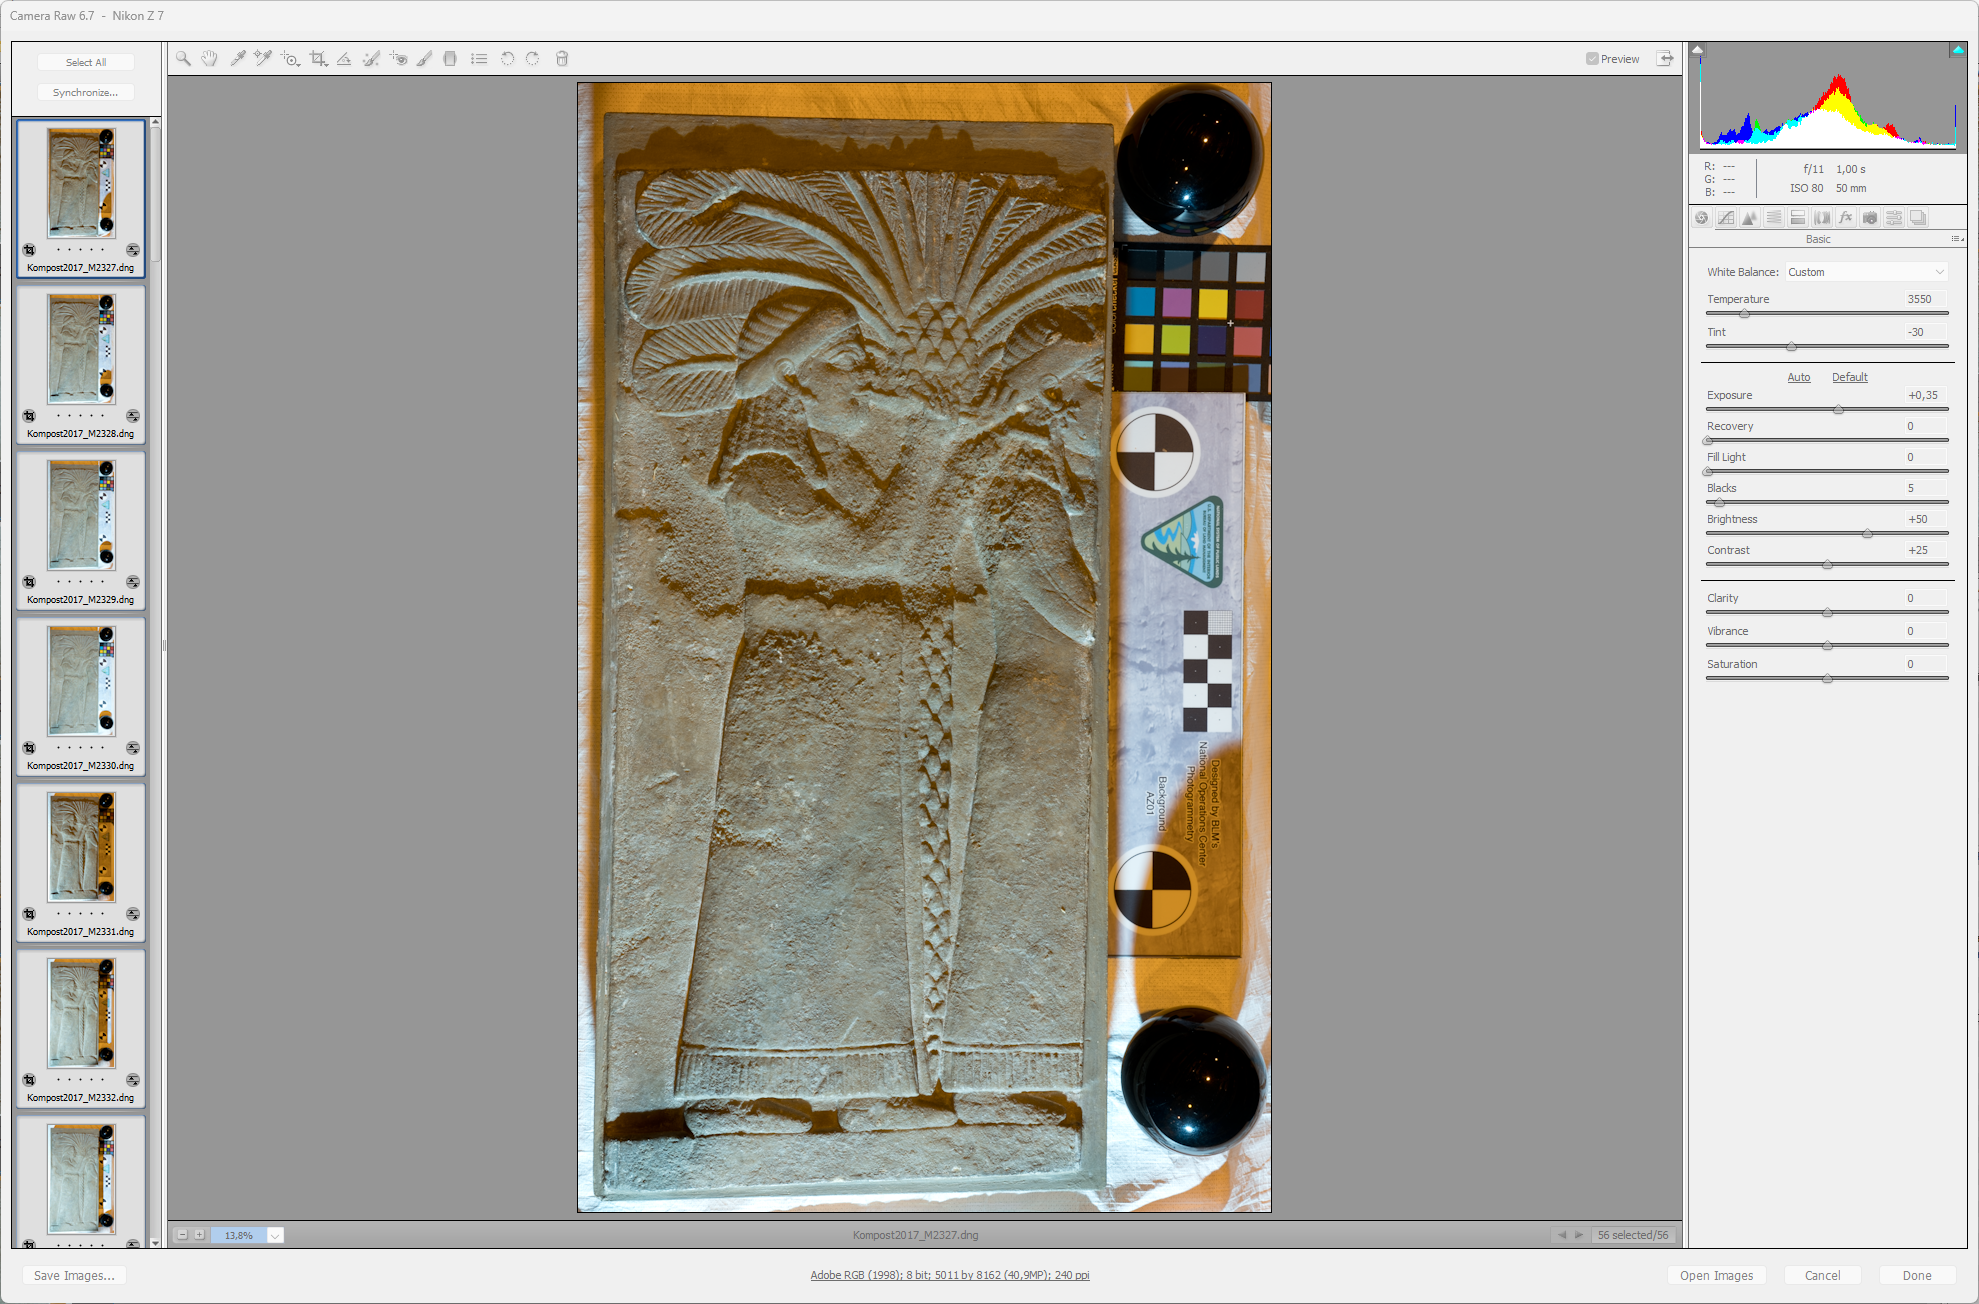
When opening in Camera Raw, make sure you first select an image in the left pane where you can clearly see the colour chart or grey card in the photo. This is important because some of the following steps involve clicking on the colour chart or grey card. Once you have selected the image, you should see it in the centre of the Camera Raw window. When you are satisfied, click again on the Select All button in the left pane. This is necessary because whatever we do to this one image, we want to do exactly the same to all the other images in the dataset. In the following chapters I will explain certain steps you can take to post-process the images before using them for Reflectance Transformation Imaging or Structure from Motion.
White Balance
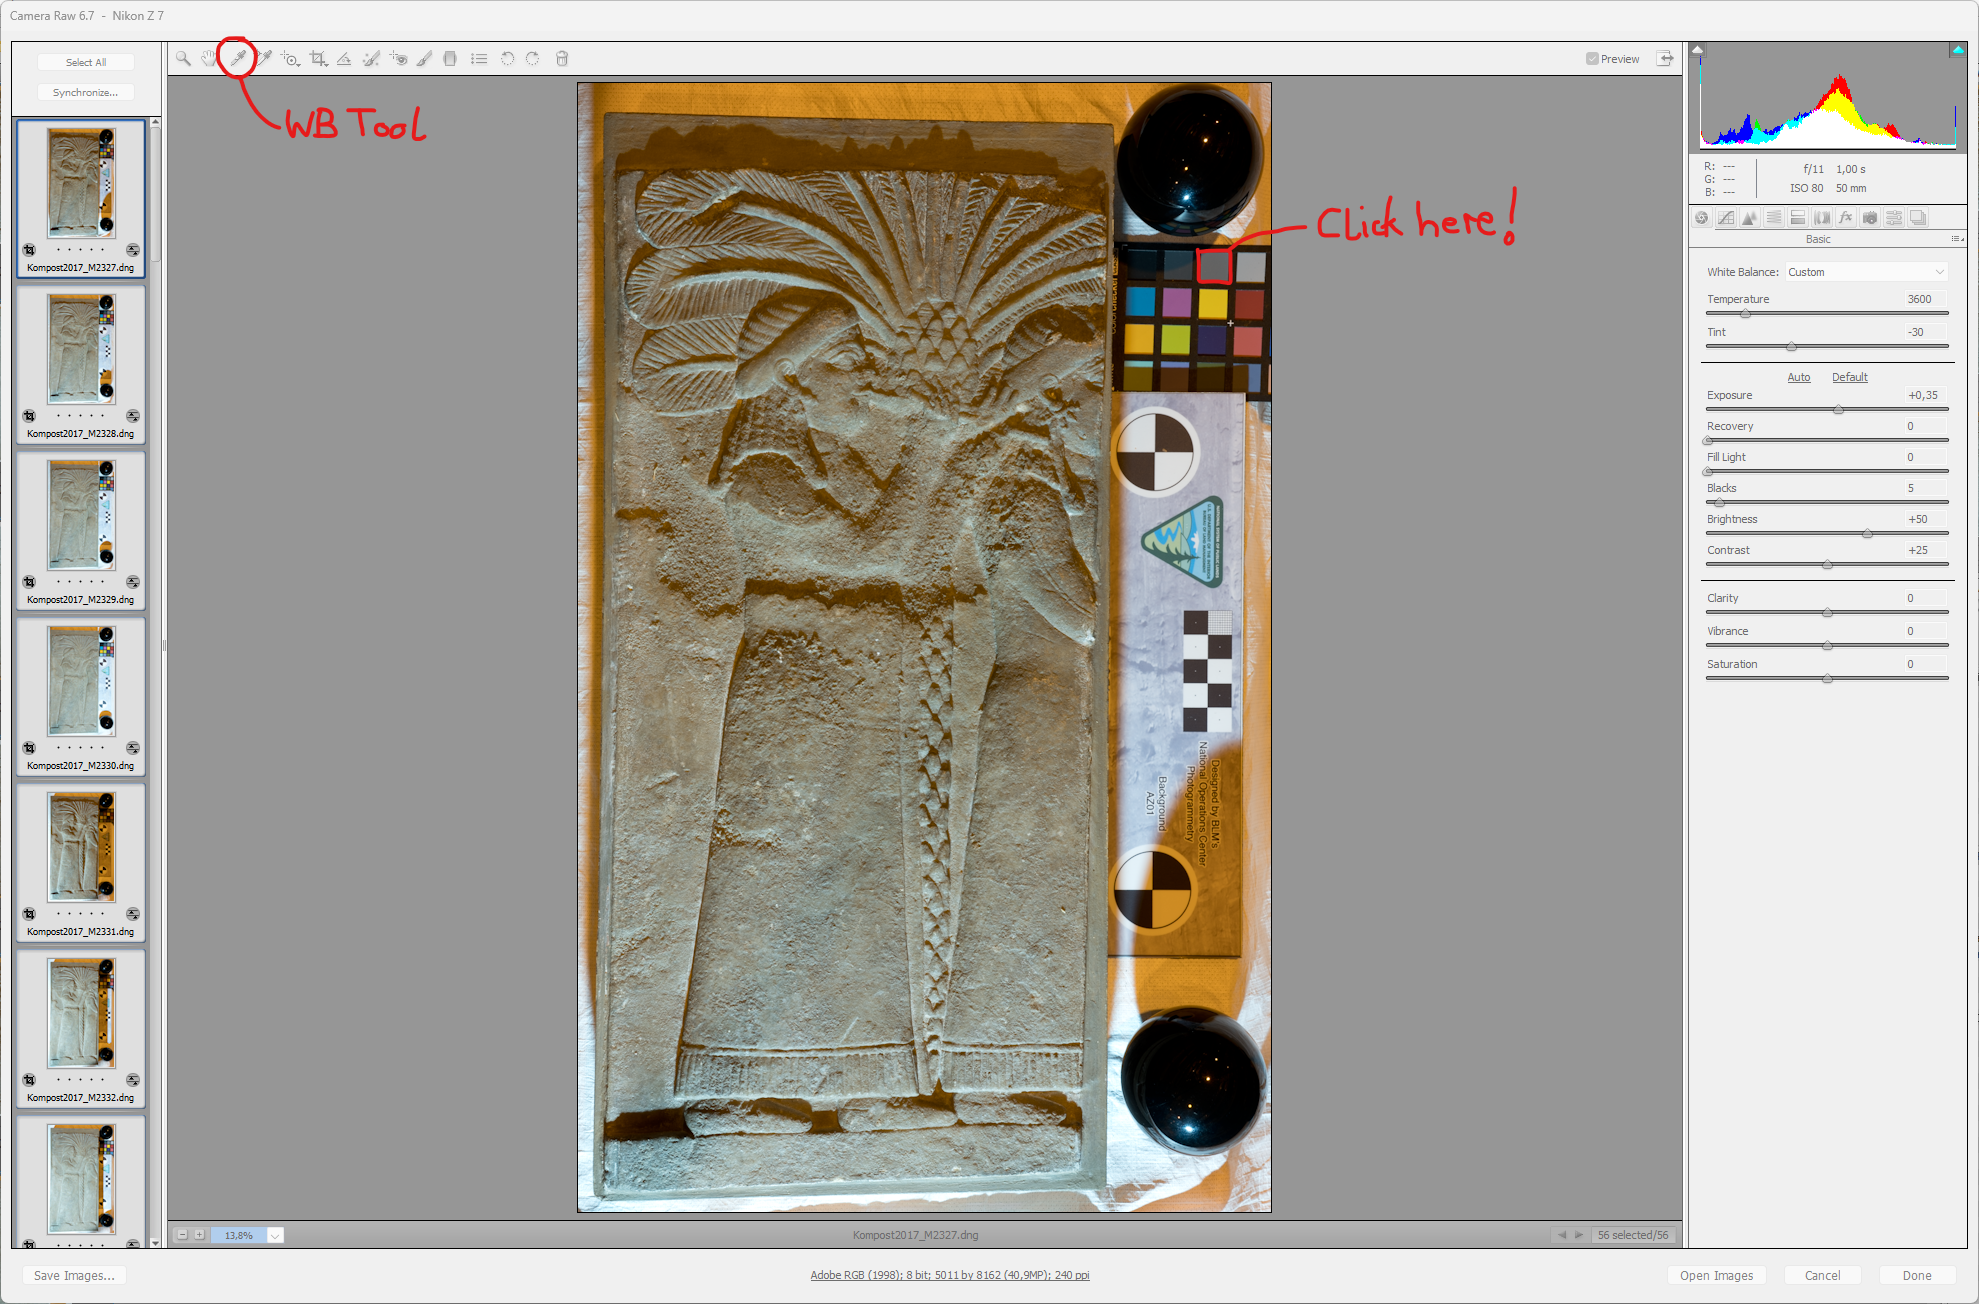
The simplest way to colour correct your images is to do a white balance. All you need is a calibrated grey card or a corresponding grey patch on a colour chart. This grey is usually a mid grey or 18% grey. We need this white balance because, depending on the lighting you use or the environment, we might end up with the wrong colours. This is not very good for archaeological documentation. So we want to do at least a white balance. If you have a grey card, white balancing is easy. If you are using a Colour Checker, you need to know which patch corresponds to 18% grey. In my case, I usually use the X-Rite ColorChecker Classic and the 18% grey is the fourth patch from white in the bottom row. To do a white balance in Camera Raw, select the White Balance Tool from the top row or press the I key. Now click on your grey patch or card and you will see some changes.
Colour Profile
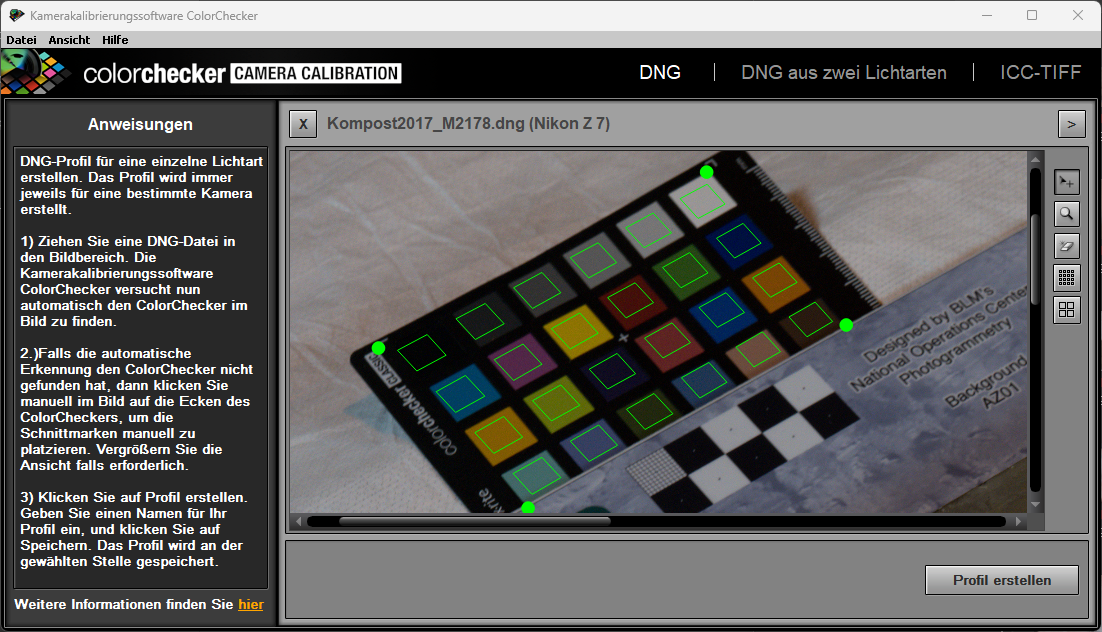
If you want to be really precise, you can also use a so-called colour profile. This is very specific to the colour checker you are using, and I can only describe the procedure for the X-Rite ColorChecker Classic, but it should be pretty much the same for other products. First you need to find the software you need to calibrate your camera. In my case, I downloaded the ColorChecker Camera Calibration 2.2.0 from X-Rite. You should know that the profile is not only specific to the colour checker you are using, but also to the lighting conditions. So if you change the lighting conditions, you also need a new profile. Fortunately, the process is quite simple. You launch the software and drop a DNG file from your data set into the software, which clearly shows the entire colour checker. The software automatically detects the colour checker in the image and every patch of colour in it. If not, you can adjust it manually. When you have done this, simply press the Create Profile button. It should automatically offer the Camera Raw Profiles folder. In Camera Raw, you can now select the profile from the Camera Calibration tab on the right. There is a dropdown called Camera Profile. You should find your profile there.
Exposure
The Exposure slider in Camera Raw can help you lighten dark images and darken bright images. See the funky curve in the top right corner? This gives you an idea of how well exposed the image is. If the peak is way to the left, the image is underexposed. If the peak is way to the right, it is overexposed. Try to find a setting where you have a good distribution with the peak in the centre. Remember that you are dealing with a whole set of data, and that any changes you make should be applied to the whole set. Especially in Reflectance Transformation Imaging there will be photos that are darker than others. If you calibrate your whole set on one dark photo, you will end up with some overexposed images. Try to find a photo that is already a bit in the middle and then adjust the exposure.

Lens Correction
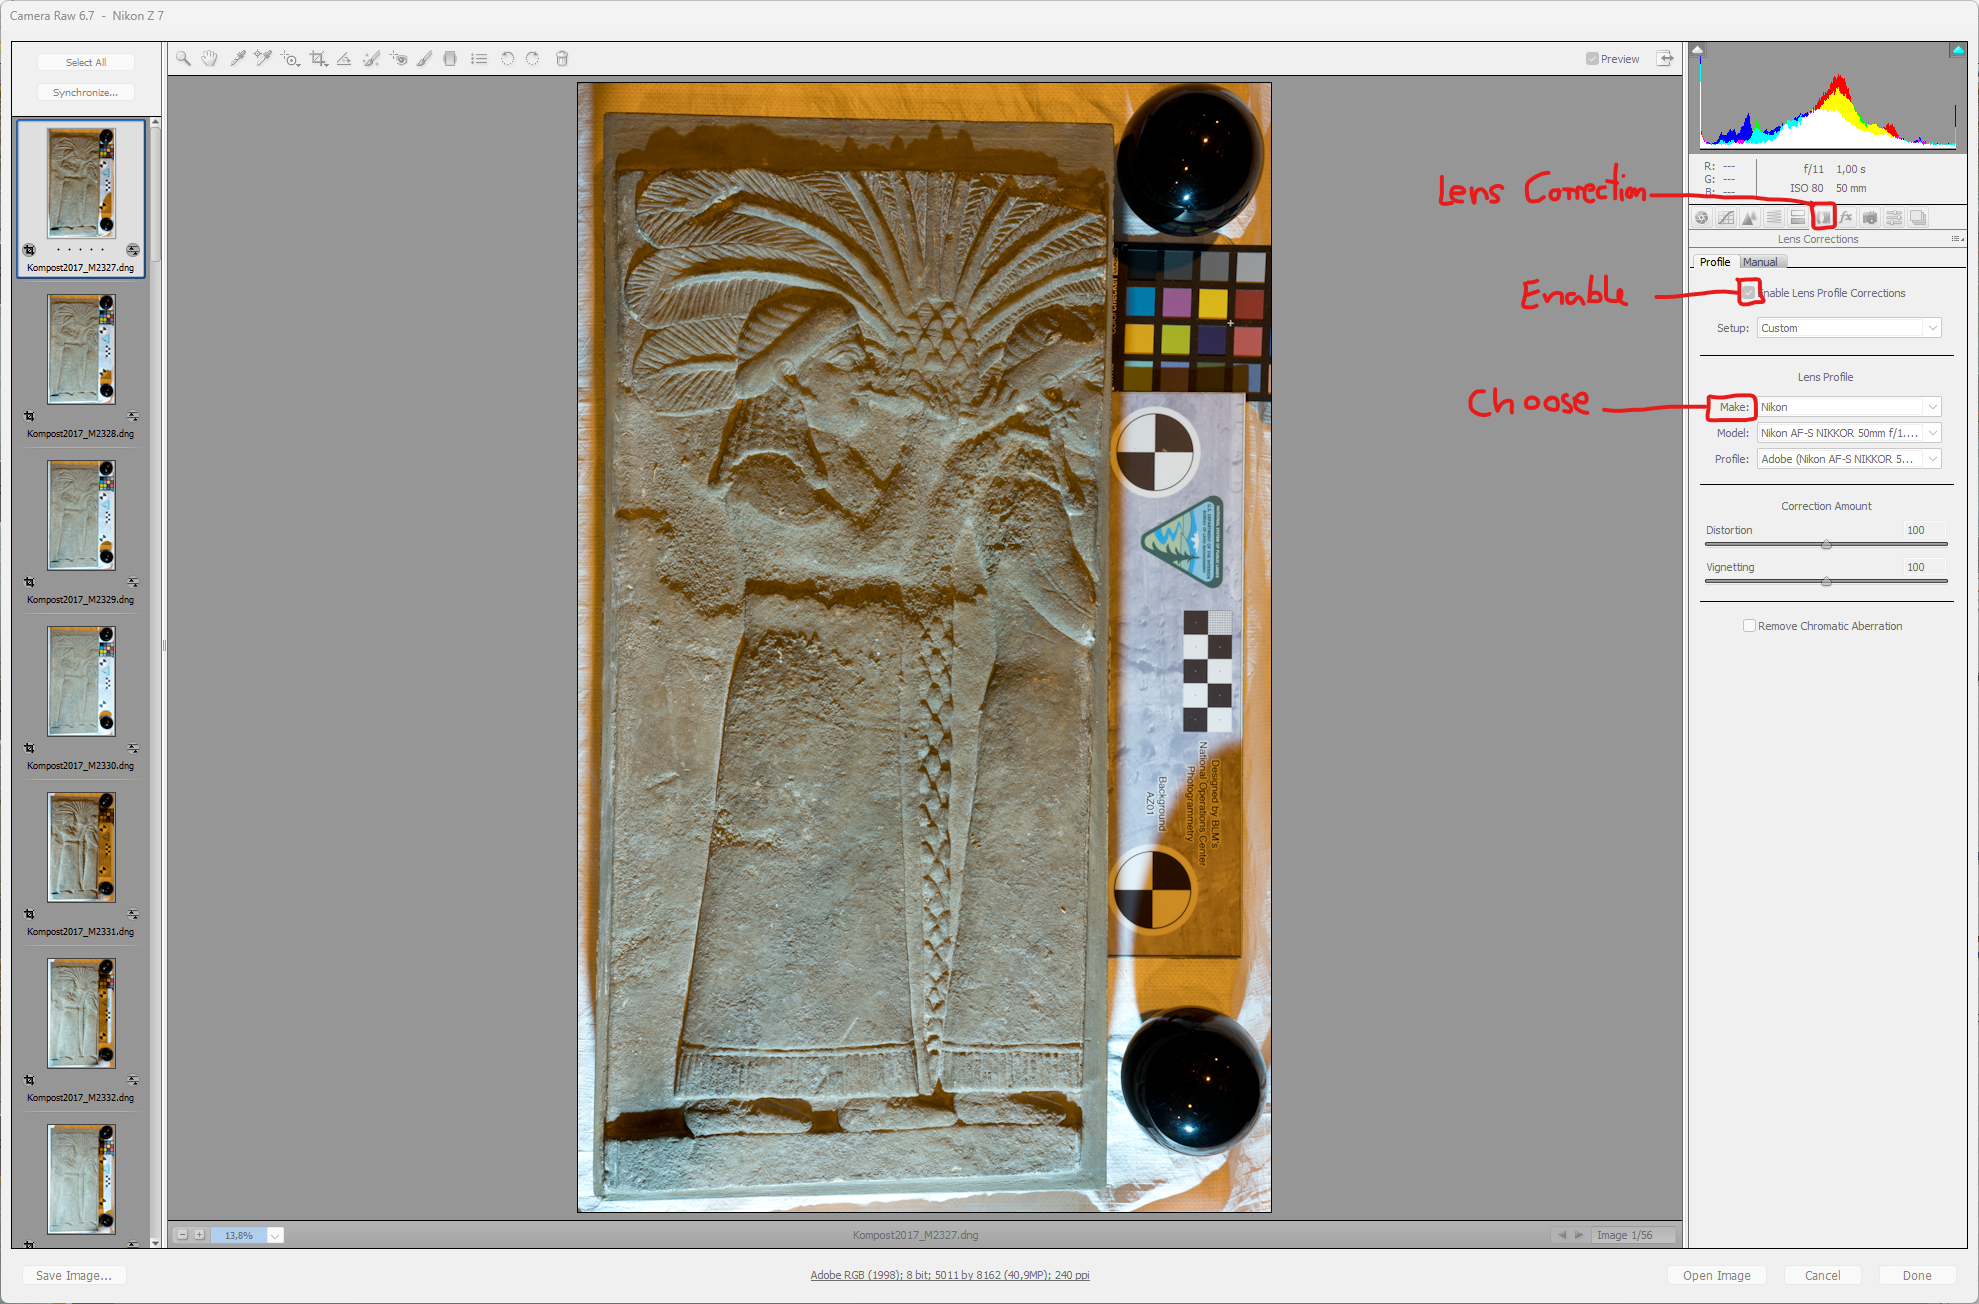
Lens correction is also an important part of image post-processing. Every camera and lens has different specifications and will distort the images slightly. Normally this is not a problem, but as we are going to use the images for further processing, we want to make sure that they are as undistorted as possible. Fortunately, lens correction is simple and straightforward, especially if you are using a newer camera. To use Lens Correction, you first need to switch to the Lens Correction tab in the right pane of the Working tab, click on Enable Lens Profile Correction and select the manufacturer of your lens from the Make drop-down menu. If your camera is known, the rest will be filled in automatically based on the metadata of your RAW images. So I selected Nikon and Camera Raw immediately knew that I was using a NIKKOR 50mm lens. If Camera Raw does not fill in these fields for you, you will have to do it yourself.
Export
The final step in this process is to export the post-processed RAW images as JPG files for further processing. Both Reflectance Transformation Imaging and Structure from Motion require JPG files to continue. So we need to export them first. To do this, click on the Save Image button in the bottom left corner. In the following dialogue box, select a destination folder by clicking on the Select Folder button. We usually put the export folder in the same folder as the rest of the dataset, but name the export folder jpeg-exports. There is no real reason for this, except that in the old days this was the name of the export folder we had to use for Reflectance Transformation Imaging. We no longer need to do this, but some things stick.
Make sure the file extension is set to .jpg and the quality to Maximum. Press the Save button and sit back. You can see the progress in the bottom left corner of the Camera Raw window. This will usually take a few minutes. Whatever you do next, you can now work with white-balanced and lens-corrected photos, which is the absolute minimum for archaeological documentation needs.
