🎨 Color and Lens Correction (RawTherapee)
If Adobe doesn't work, we have to turn to other software. For colour and lens correction we can use the freeware RawTherapee, which is not only free, but available for PC, Mac and Linux!
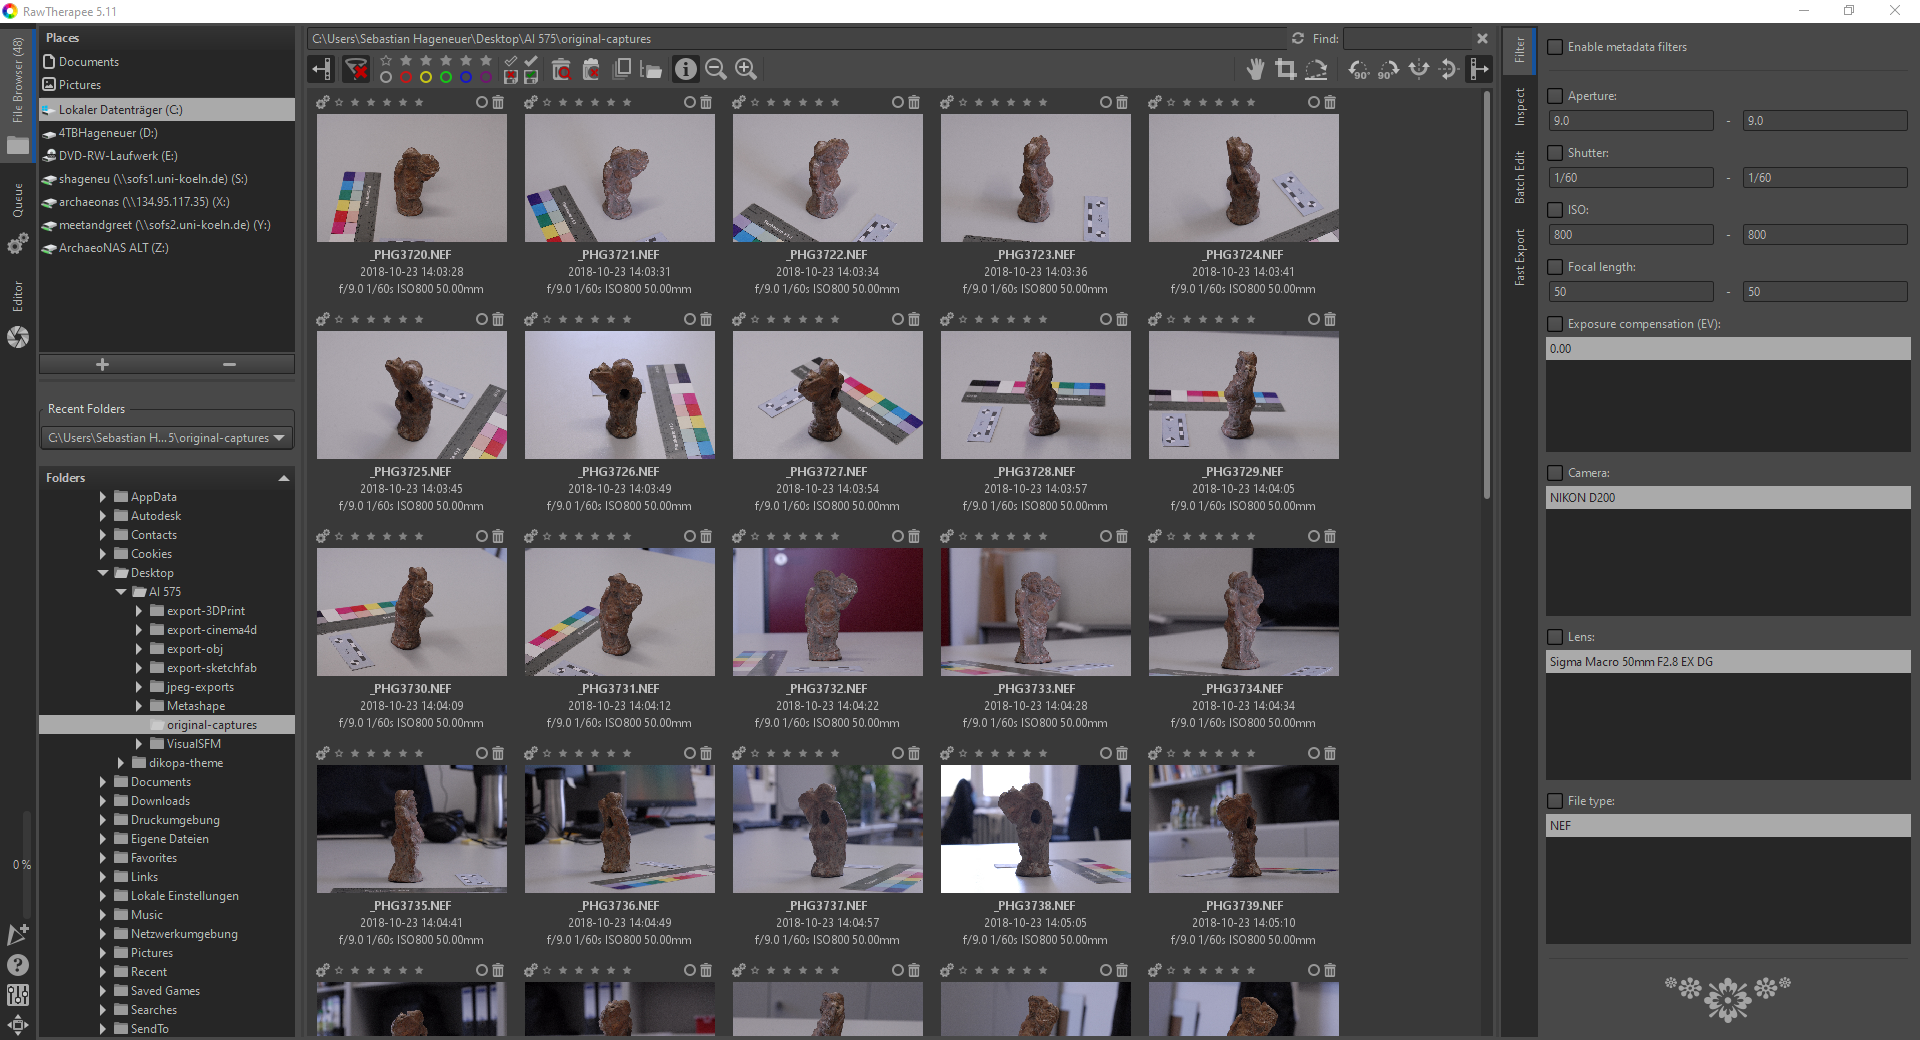
When opened, the left pane will take us directly to our folder of RAW files. Double-clicking on the folder should bring up the RAW files in the middle pane. To batch process them all, we first need to make sure they are all selected. So we click on one of the images in the middle pane to make sure it is active, and then press CTRL+A to select them all. All the images should now have a light grey background contrasting with a dark grey background. Between the middle pane and the right pane you'll find a couple of small buttons/ribbons. Click on the one called Batch Edit.
Exposure
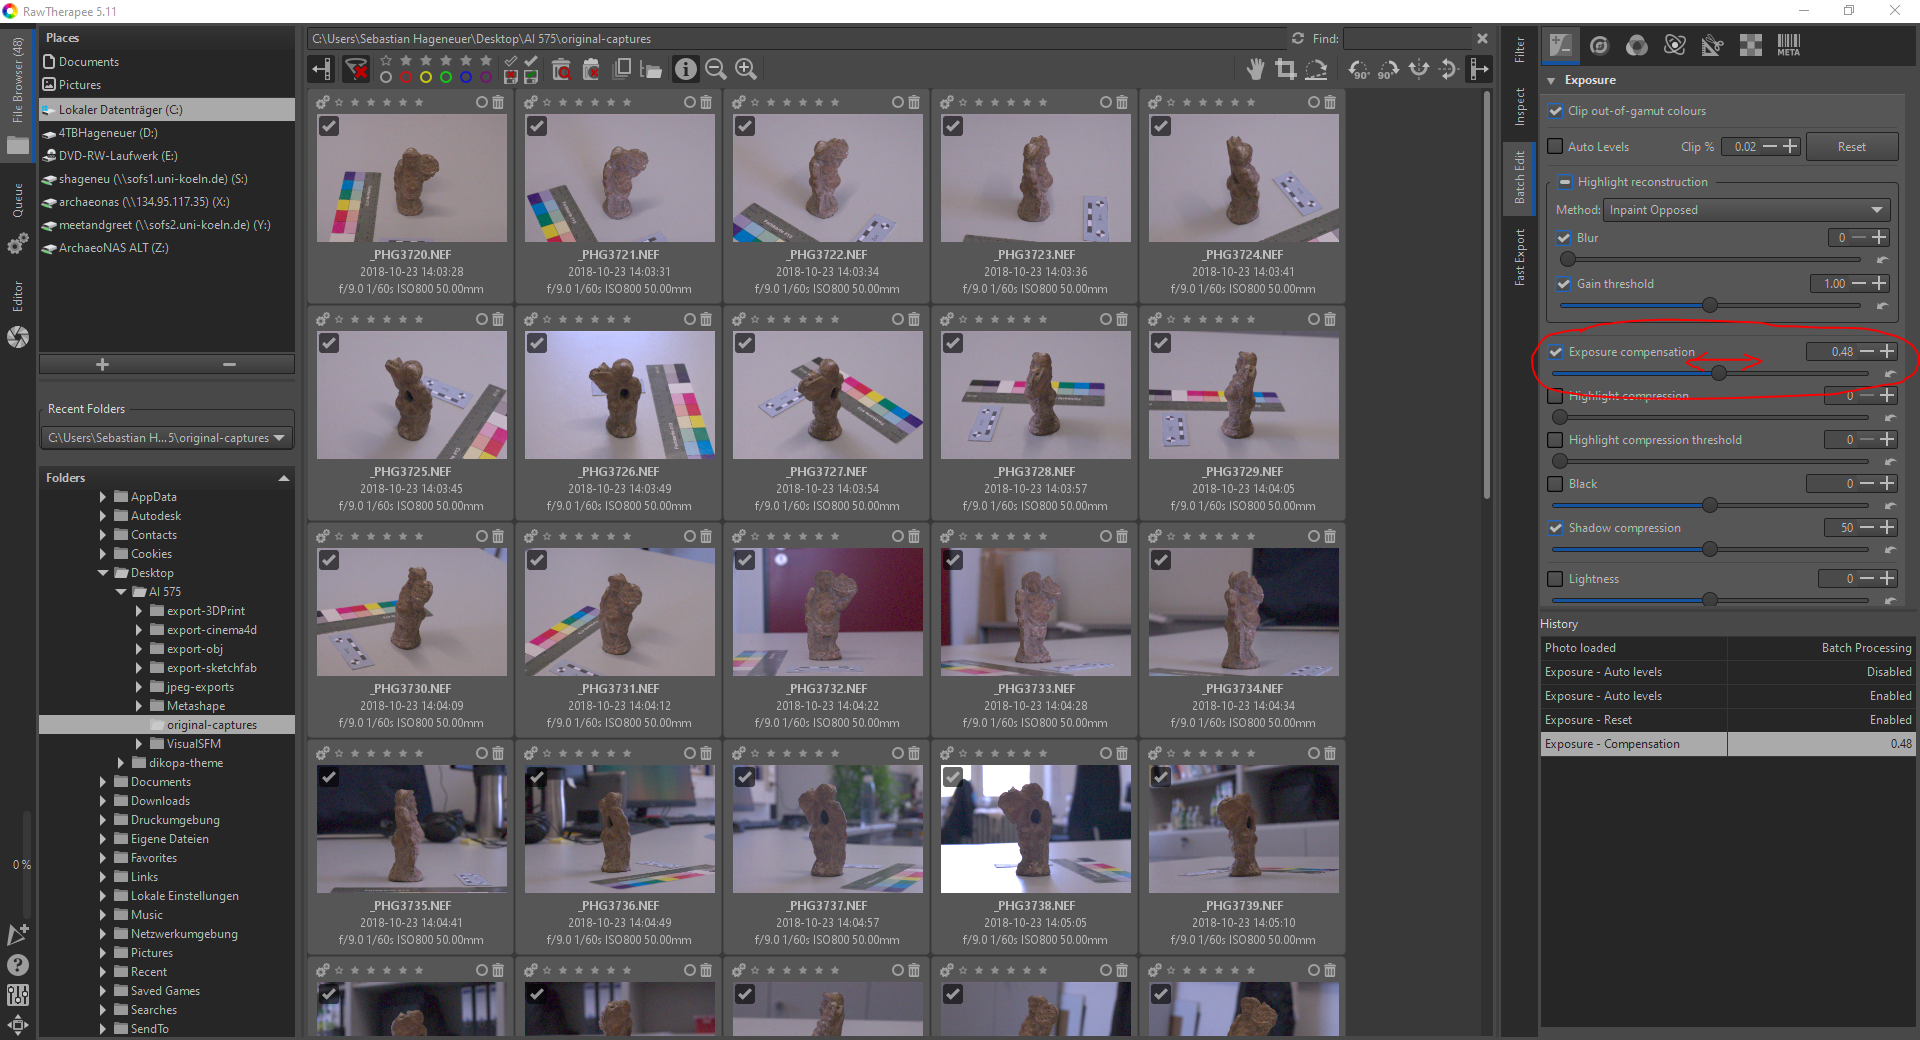
So the first thing to check is the overall exposure. If you shoot in a dark room or in bright daylight, your photos may be too dark or too bright. We can at least compensate for this a little, although if a picture is too dark or too bright, there is nothing we can do about it. In the right pane, you'll find a few icons at the top. If you select the first one ("Exposure"), you should see the options available to you below. The first one, Exposure, can be expanded using the little arrow next to it. Find the Exposure Compensation slider and move it very carefully. You'll see that your photos will become brighter or darker. The important thing is to find a setting where all your photos aren't too dark or too light. So scroll down your selection in the middle window to check.
White Balance
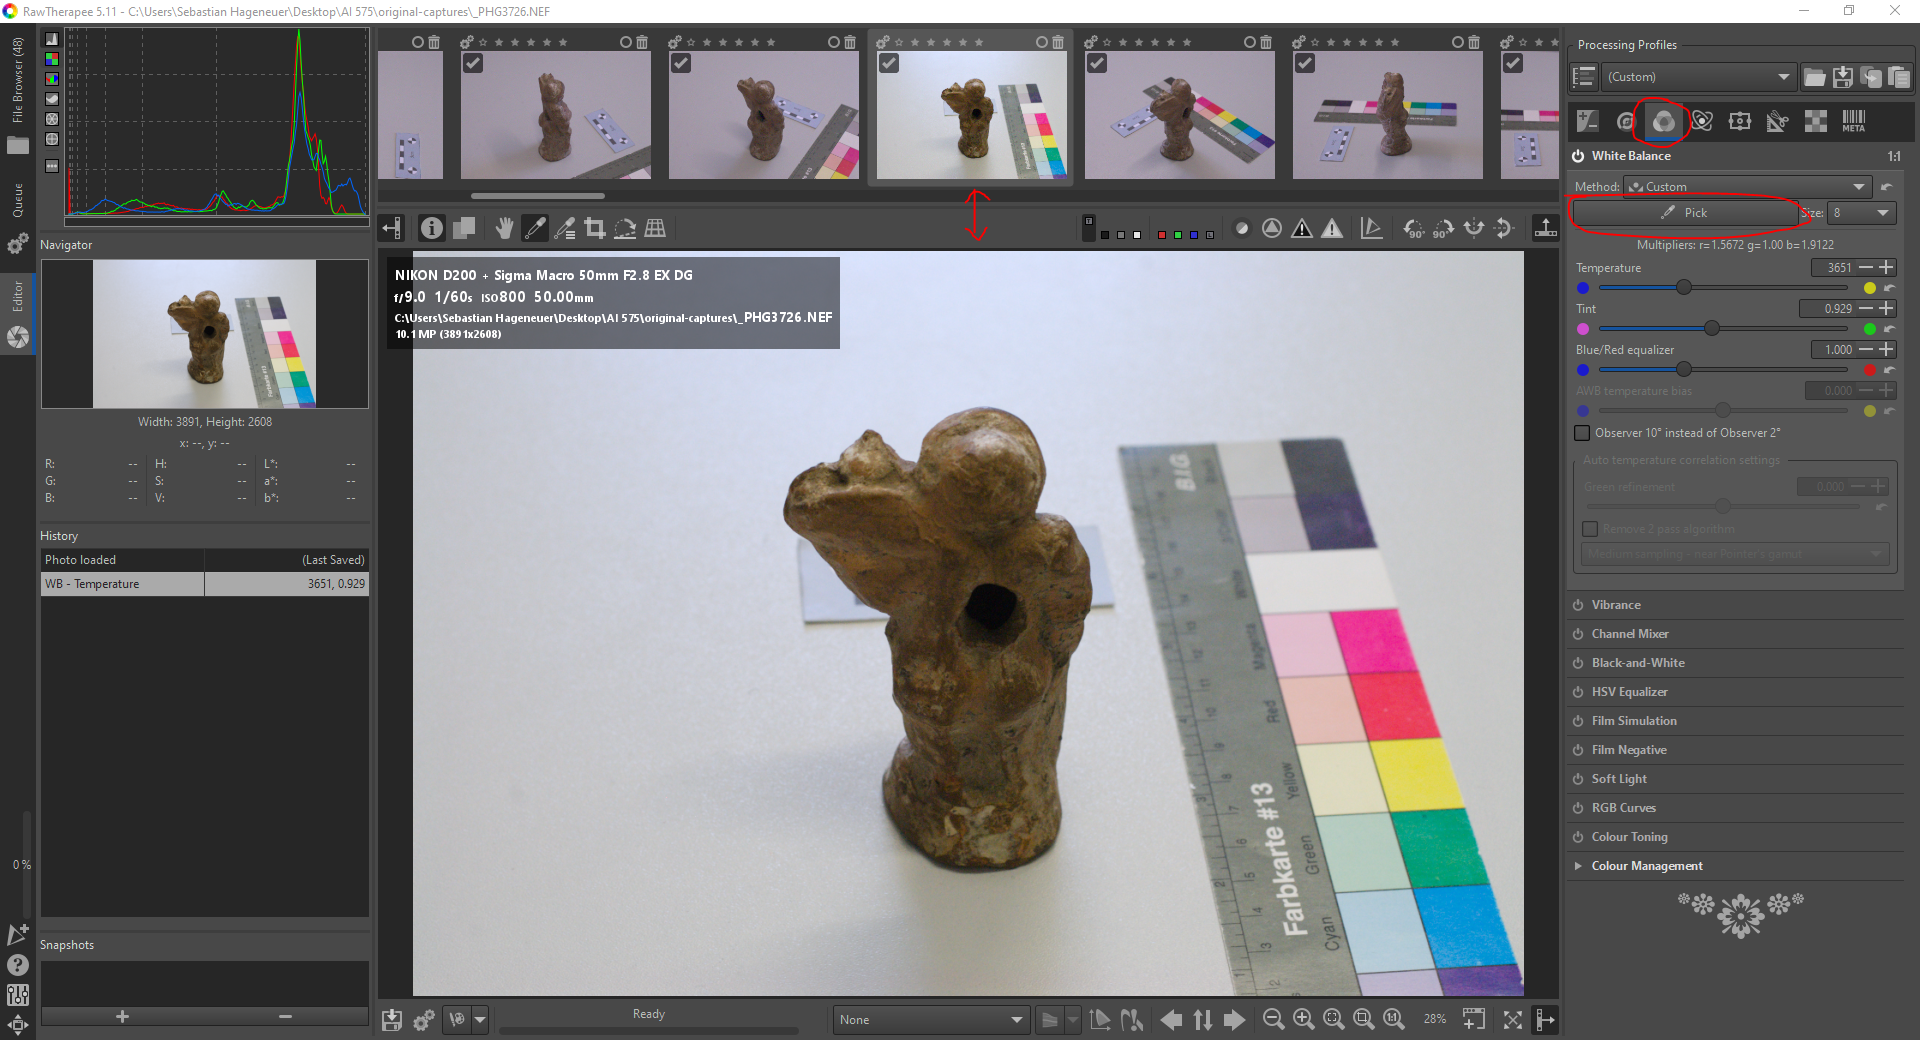
Ok, so finding the white balance is easy, but applying it to all the photos is a bit more complicated. At least I haven't found another solution yet. So, in your central window, select a photo where you can clearly see the 18% grey value on the colour bar. Double-click on the image to bring it into Editor mode. In the right pane, you can still see the icons at the top. Find the one called "Colour" (the third one) and click it. At the top of the list you'll find 00White Balance. Clicking on it will open the dialogue box where you'll find several options for adjusting the white balance. Click on the Pick== button and then click wihtin the image on the 18% grey patch. You should see a subtle change in the colours.
We now need to apply this change to all the other photos. To do this, right-click on the already balanced photo in the Preview slider at the top of the central window and select Profile Editing and Copy. When you press CTRL+A again, all the other images in the top slider should be selected (indicated by a lighter grey background). Now right-click on one of the unbalanced images in the slider and choose Profile Operations and Insert. All images should now be white balanced. You can click on File Browser again on the far left to go back to batch mode.
Lens Correction
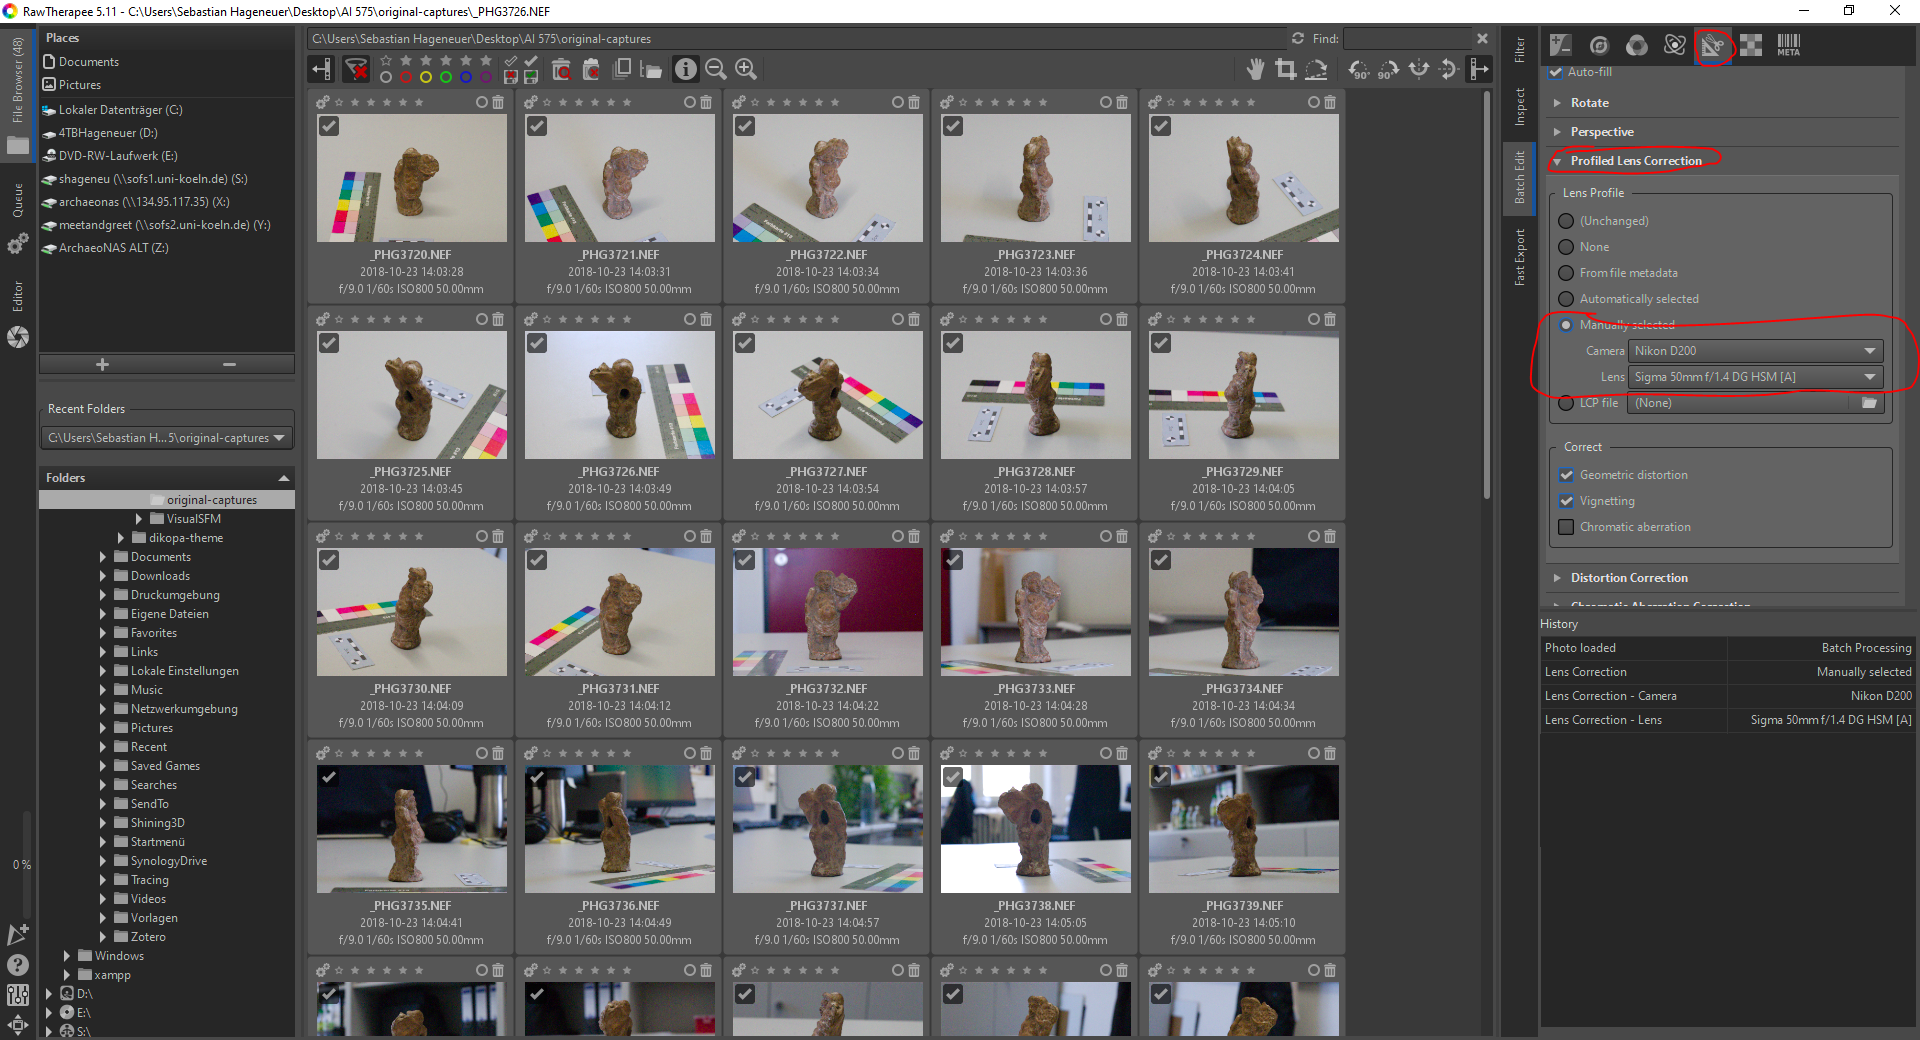
In Batch Edit mode, locate the Transform icon. Below it, you'll find a drop-down called "Profiled Lens Correction". So if the metadata is good, the 'Automatically selected' setting is the way to go. You should also select this if you are not sure which camera model was used or which lens was attached. However, if you do have this information, it makes sense to select 'Manually selected' and select the appropriate options. There is a long list of manufacturers, so you should be able to find your camera model and lens easily. The final step is to export the images to JPG format.
Exporting
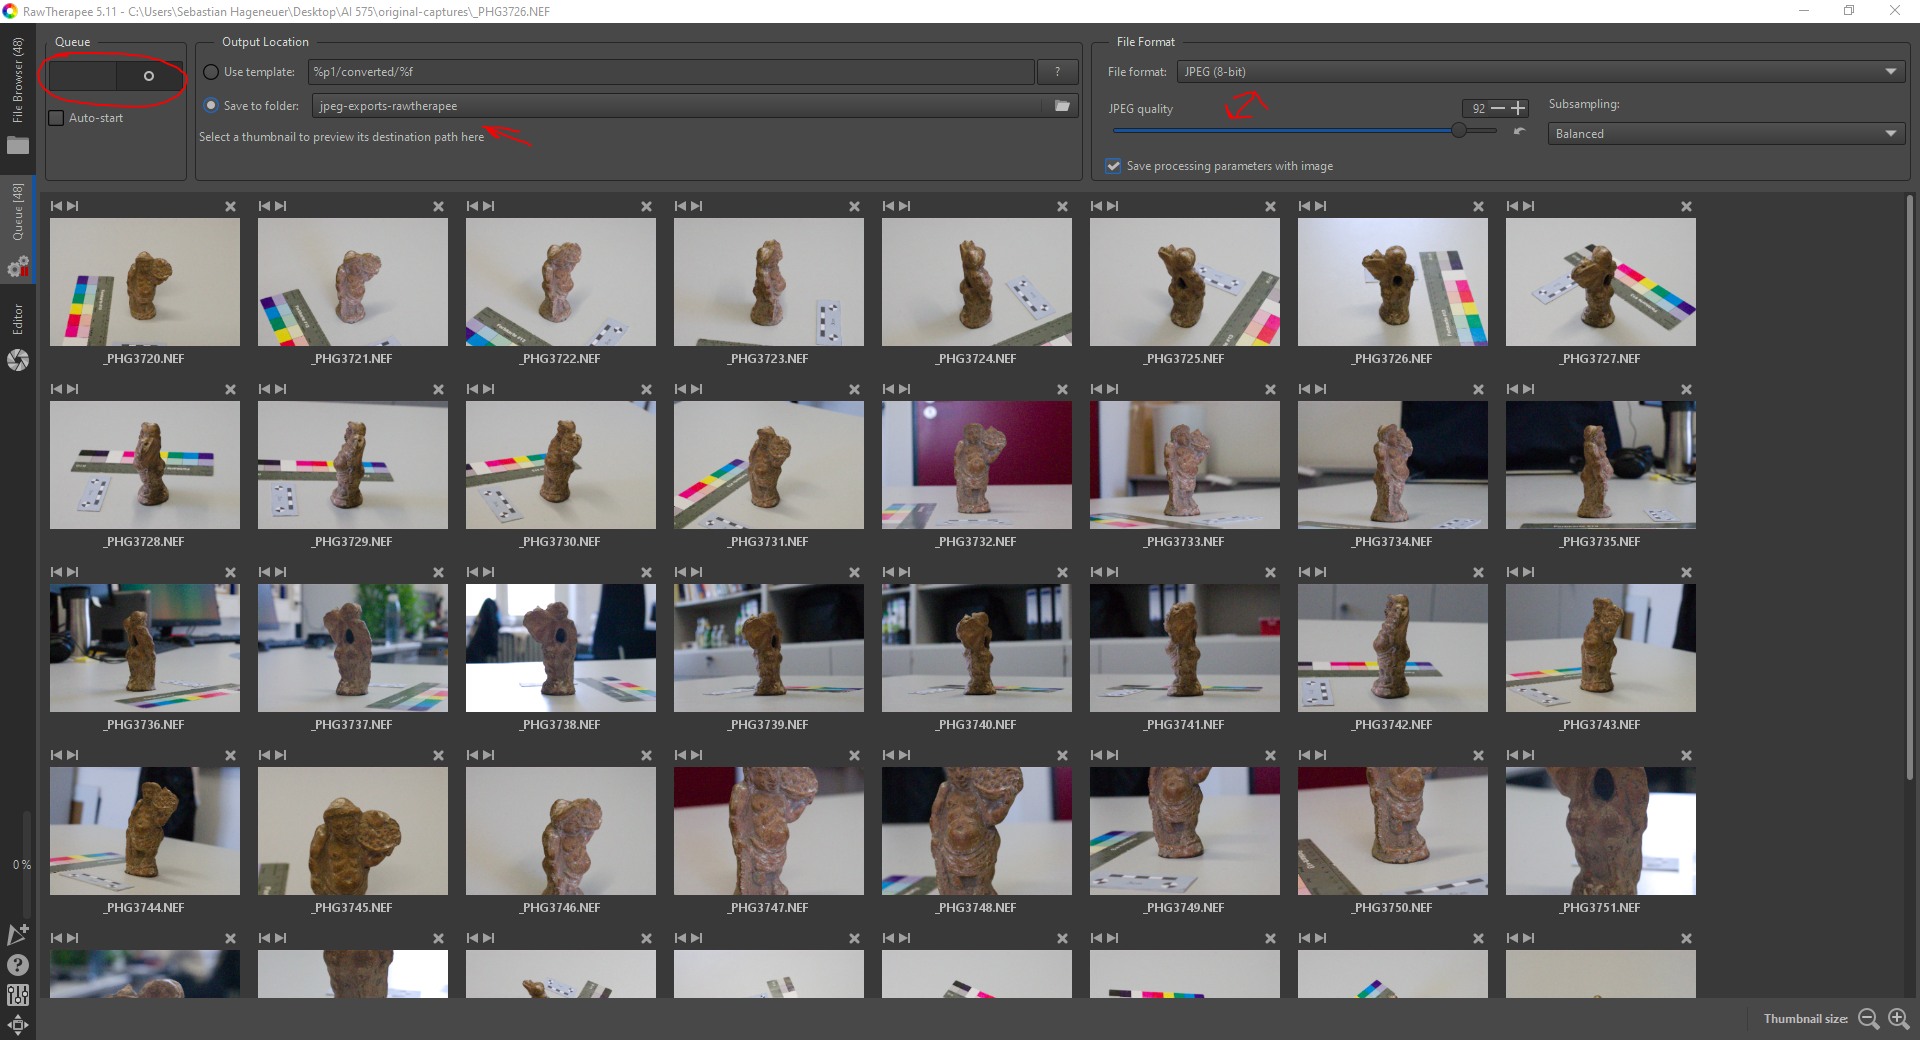
In Batch Edit mode, you should still have all the images selected. If not, press CTRL+A again. Right click on one of the images and select Put to Queue. On the left hand side you should now see a ribbon called "Queue" with the number of images you put in it. Click on the ribbon and you will be in the export menu. Select Save to Folder and choose a folder where the exported images will be saved. Make sure the file format is set to JPEG and the quality is high (above 90). Uncheck Save processing parameters with image as it will create unnecessary files. You can now press the strange looking button on the left under 'Queue'. It will take a moment, but you should find the edited and exported JPG files in the folder you specified!
