Exercise 1b: RelightLab
The software we will be using in this chapter is called RelightLab and is provided by the Visual Computing Lab in Pisa, Italy. It is free of charge!
Installation
Here you can download the latest version of RelightLab. Just choose your platform and find the appropriate file. For example, for Windows, download the file with the extension "-windows.zip", download it and unzip it somewhere. You don't need to start any installation procedure, just unzip it. To start the software just click on relight.exe.
Building the RTI

So first we need to open some images. Click on the New Project... icon or press CRTL+N. Navigate to your colour corrected and lens corrected images and open them. All the images should appear in the list on the left and the first image should be visible in the main window. Note that you can click through the list on the left to see the corresponding image in the main window. If you do not want to use one of the images in the list, you can click on the little x next to it and it will be ignored.

The next step is to specify the position of the sphere(s). Yes, that's right, with this software you can finally use multiple spheres! First click on the small sphere at the top of your file list and below the sphere list. You can now specify three points in the image to form a circle. The points should be on the edge of the sphere. Try clicking on three different points until you can see the whole circle around them. If you are not happy, you can still manipulate the circle or delete your sphere from the Spheres list by clicking on the trash can. You can also add more spheres and simply repeat the process.

You can now start the highlight detection. Just go to the menu and select Edit/Find Highlights. It takes a moment, but is much faster than before. When it has finished detecting, take a quick look at your file list. Select a few images and see if the green crosses are at the highlight position of the sphere. If not, you can move them manually using your mouse. Sometimes highlight detection doesn't find any highlights on a sphere. You can either repeat the process and increase the size of the yellow circles around the spheres, manually adjust the highlight to the correct position, or simply remove the image from your file list as described above.

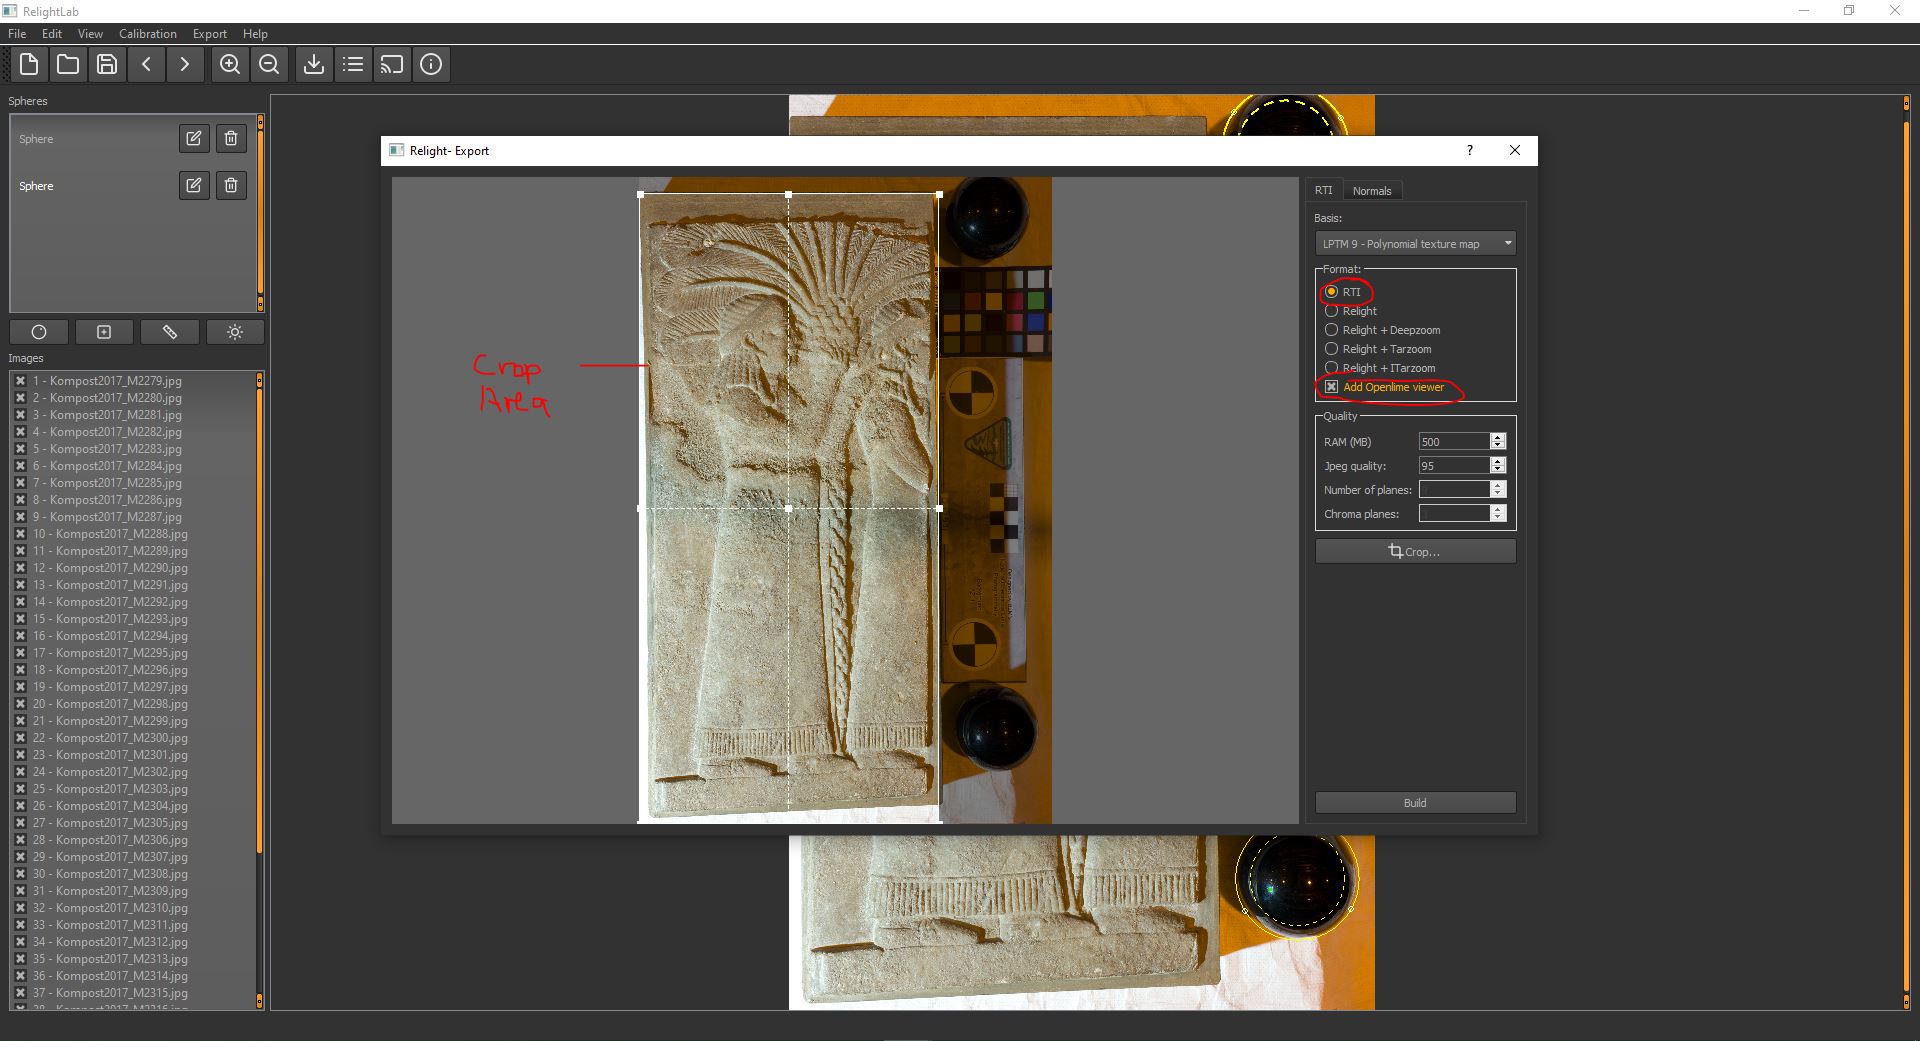
Now all we have to do is export the RTI image. RelightLab has several options to do this, but I will only discuss two of them here: RTI image export and Openlime export. Both exports can be done in one step, so first click in the menu on Export/Export RTI.... A new window appears with many options. Don't worry too much about them. First select RTI in the format list and also check Add Openlime viewer. If you like, you can also crop the image now, as we don't need to see the whole thing. When you click on the Crop button, you will see a small window at the top of your image. Resize it to the part you want to keep. Finally, click on Build and choose a folder where you want to save your work. When RelightLab is finished, you can either save your progress or simply close the software.
