Exercise 3: The RTIViewer
Viewing and analysing RTIs can be done in many ways, but for this lesson we will focus on the RTIViewer software from the Visual Computing Laboratory and Cultural Heritage Imaging.
Installation
You can download the software from the [Cultural Heritage Imaging] website(https://culturalheritageimaging.org/What_We_Offer/Downloads/View/index.html). Choose the version that matches your operating system and start the installation. The software should install itself very easily. On the same page, you will also find the software documentation in PDF format. Once installed, simply double-click on a PTM or RTI file and the RTIViewer should open.
Viewing RTIs

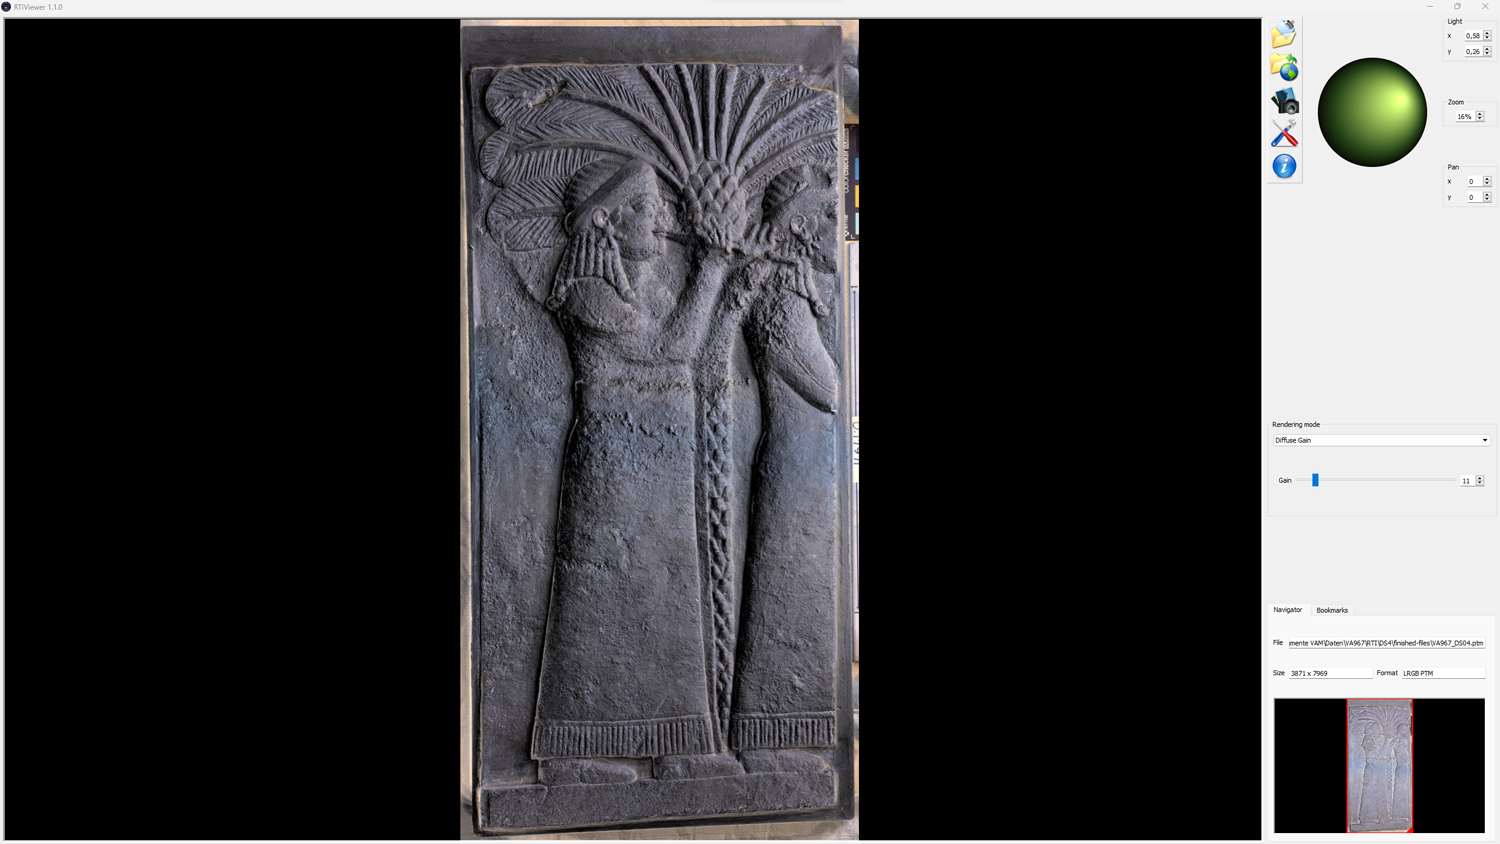
On the left is the default RTI image. On the right you'll see some buttons, a large green sphere and other menus. Let's start by exploring the Virtual Lighting function. All you have to do is click and drag the green sphere to see what happens: The light moves according to your mouse, illuminating the object as you wish. Especially in the area of the raking light (so close to the outer ring) you can see great results. If you want to save a screenshot, click on the camera icon next to the green sphere. You can also 'bookmark' the view you like by creating a new bookmark at the bottom. This will save the light position and filters (see below), and you can add some comments. This is great for discussing your RTI with colleagues.
Rendering mode
Rendering mode is where things really get exciting. If you open the drop-down menu in the middle, you'll see a number of rendering modes or filters. You can find detailed descriptions of these in the manual, but let's take a look at three of them.
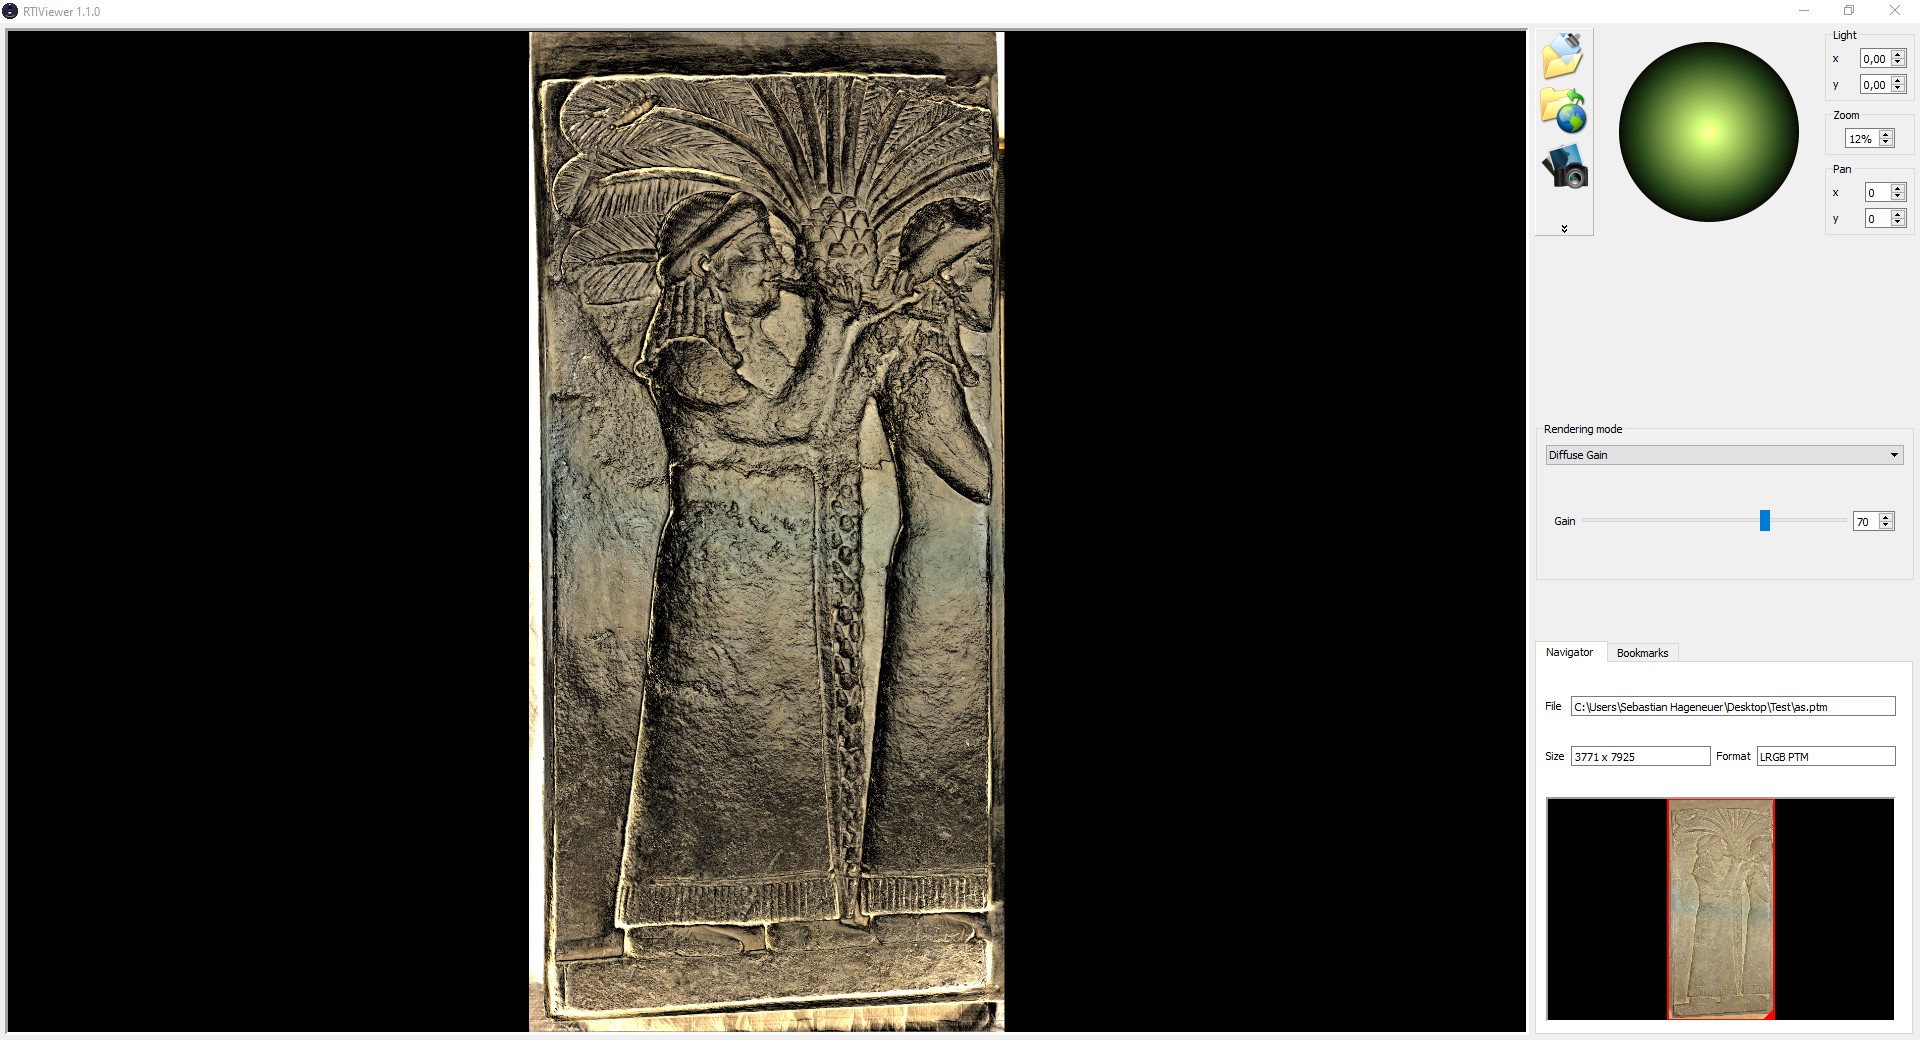
Diffuse Gain

This mode enhances the perception of surface shape features of the subject for interpretation purposes. Use the Gain slider to adjust intensity.
Diffuse gain increases the representation of quickly-changing height and depth on the subjects surface. For example, if a surface area has a quickly-changing sequence of normals directions that form a depression, this enhancement function deepens the depression by increasing the directional rate of change (the second derivative) of the surface's slope.
In a nutshell: If your object has a lot of very fine detail, the Diffuse Gain filter can enhance that detail to make it more visible to the naked eye. You can also use the green sphere to explore different lighting settings to find details you haven't seen before!
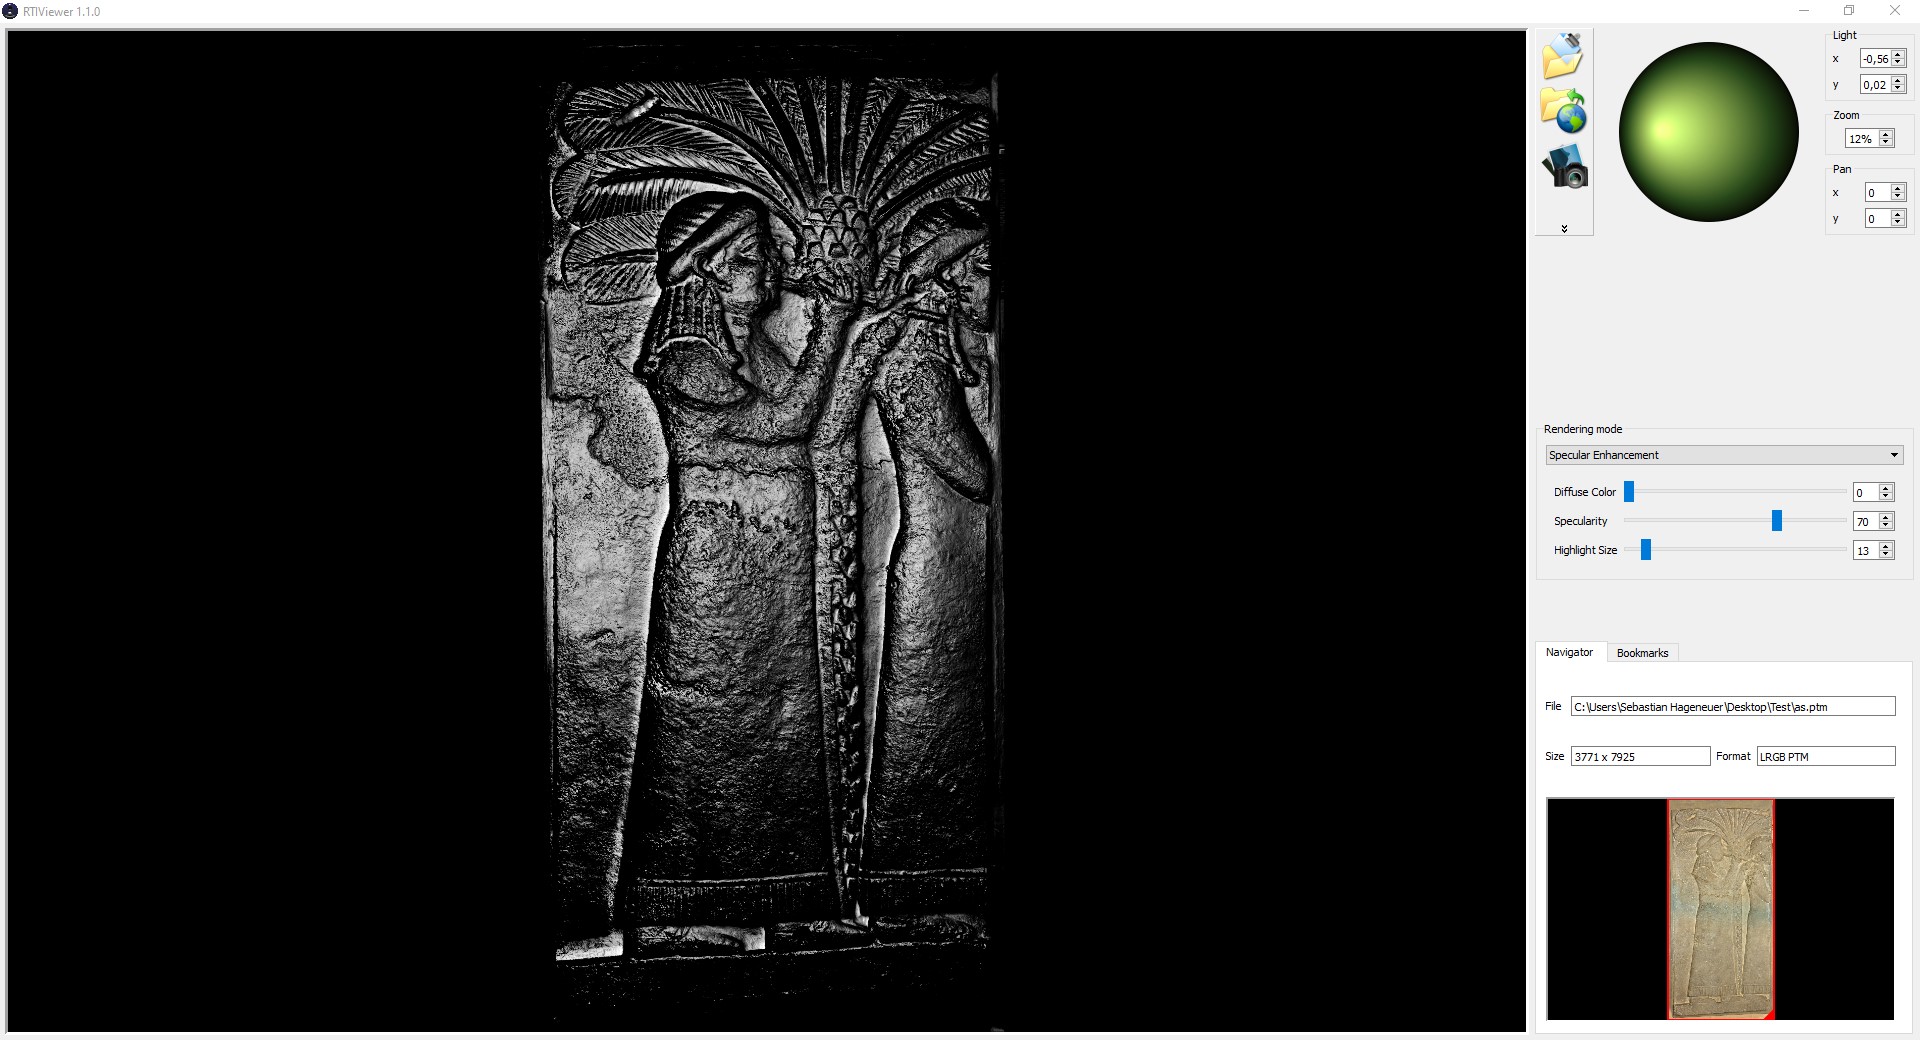
Specular Enhancement

This mode also enhances the perception of surface shape. You can remove all colour from the image and play around with specularity and highlight size.
Different materials have different degrees of shininess. Matte objects (such tennis balls) have large and soft specular reflections while very smooth materials (such as billiard balls) have small and sharp specular reflections. This algorithm separates out the diffuse RGB color, specular reflection derived from the surface shape of the subject, and the size of the specular highlights. It can then render the shape-based reflections and RGB color either separately or in combination.
Sometimes it helps to make objects wet when observing them. This filter simulates this and can also remove any colour that might interfere with what you are looking for.
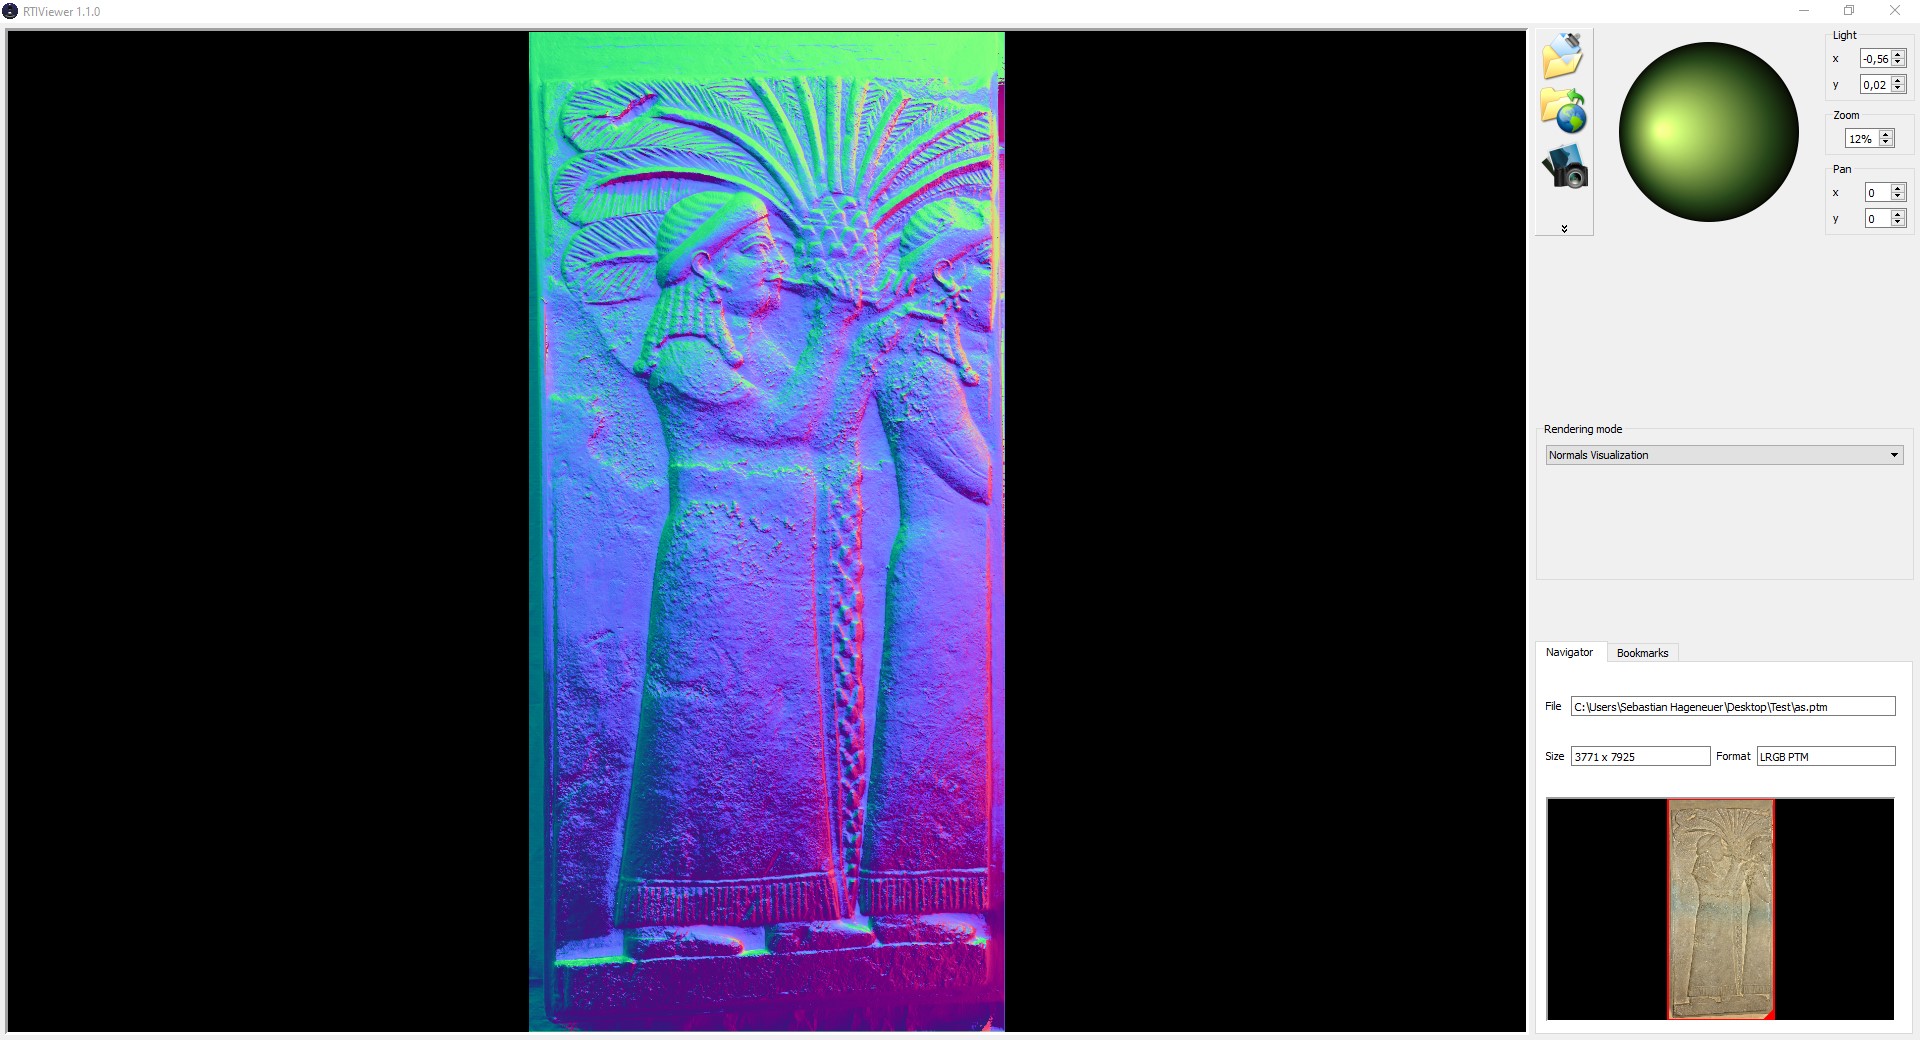
Normals Visualization

RTIViewer's Normals Visualization mode creates a false-color rendering that shows the subject's pixel-by-pixel surface orientation. In this rendering, the X, Y, and Z components of the normal value at each pixel are represented as red, green, and blue, respectively.
Finally, this filter shows you the direction of the detected and calculated normals in the image. With this visualisation you can see if a bump is going in or out. This is sometimes very helpful in clarifying the topography of the object.
