Chapter 5: Meshing the points

This dense point cloud, which can contain tens of millions of points, can then be used as the basis for creating a mesh based on the point cloud, to which the original images can finally be applied as a texture (Powlesland 2016: 21). In this way, we transform our point cloud into a solid 3D object that will be transformed into a photorealistic texture in the next chapter. This object can then be used in any 3D software. You can use the scanned object as an object in a 3D scene or upload the data to a 3D viewer available on the internet to allow others to see your work. The first step, however, is to connect all the points to create a solid 3D object, in other words, to build our mesh.
Building a Mesh
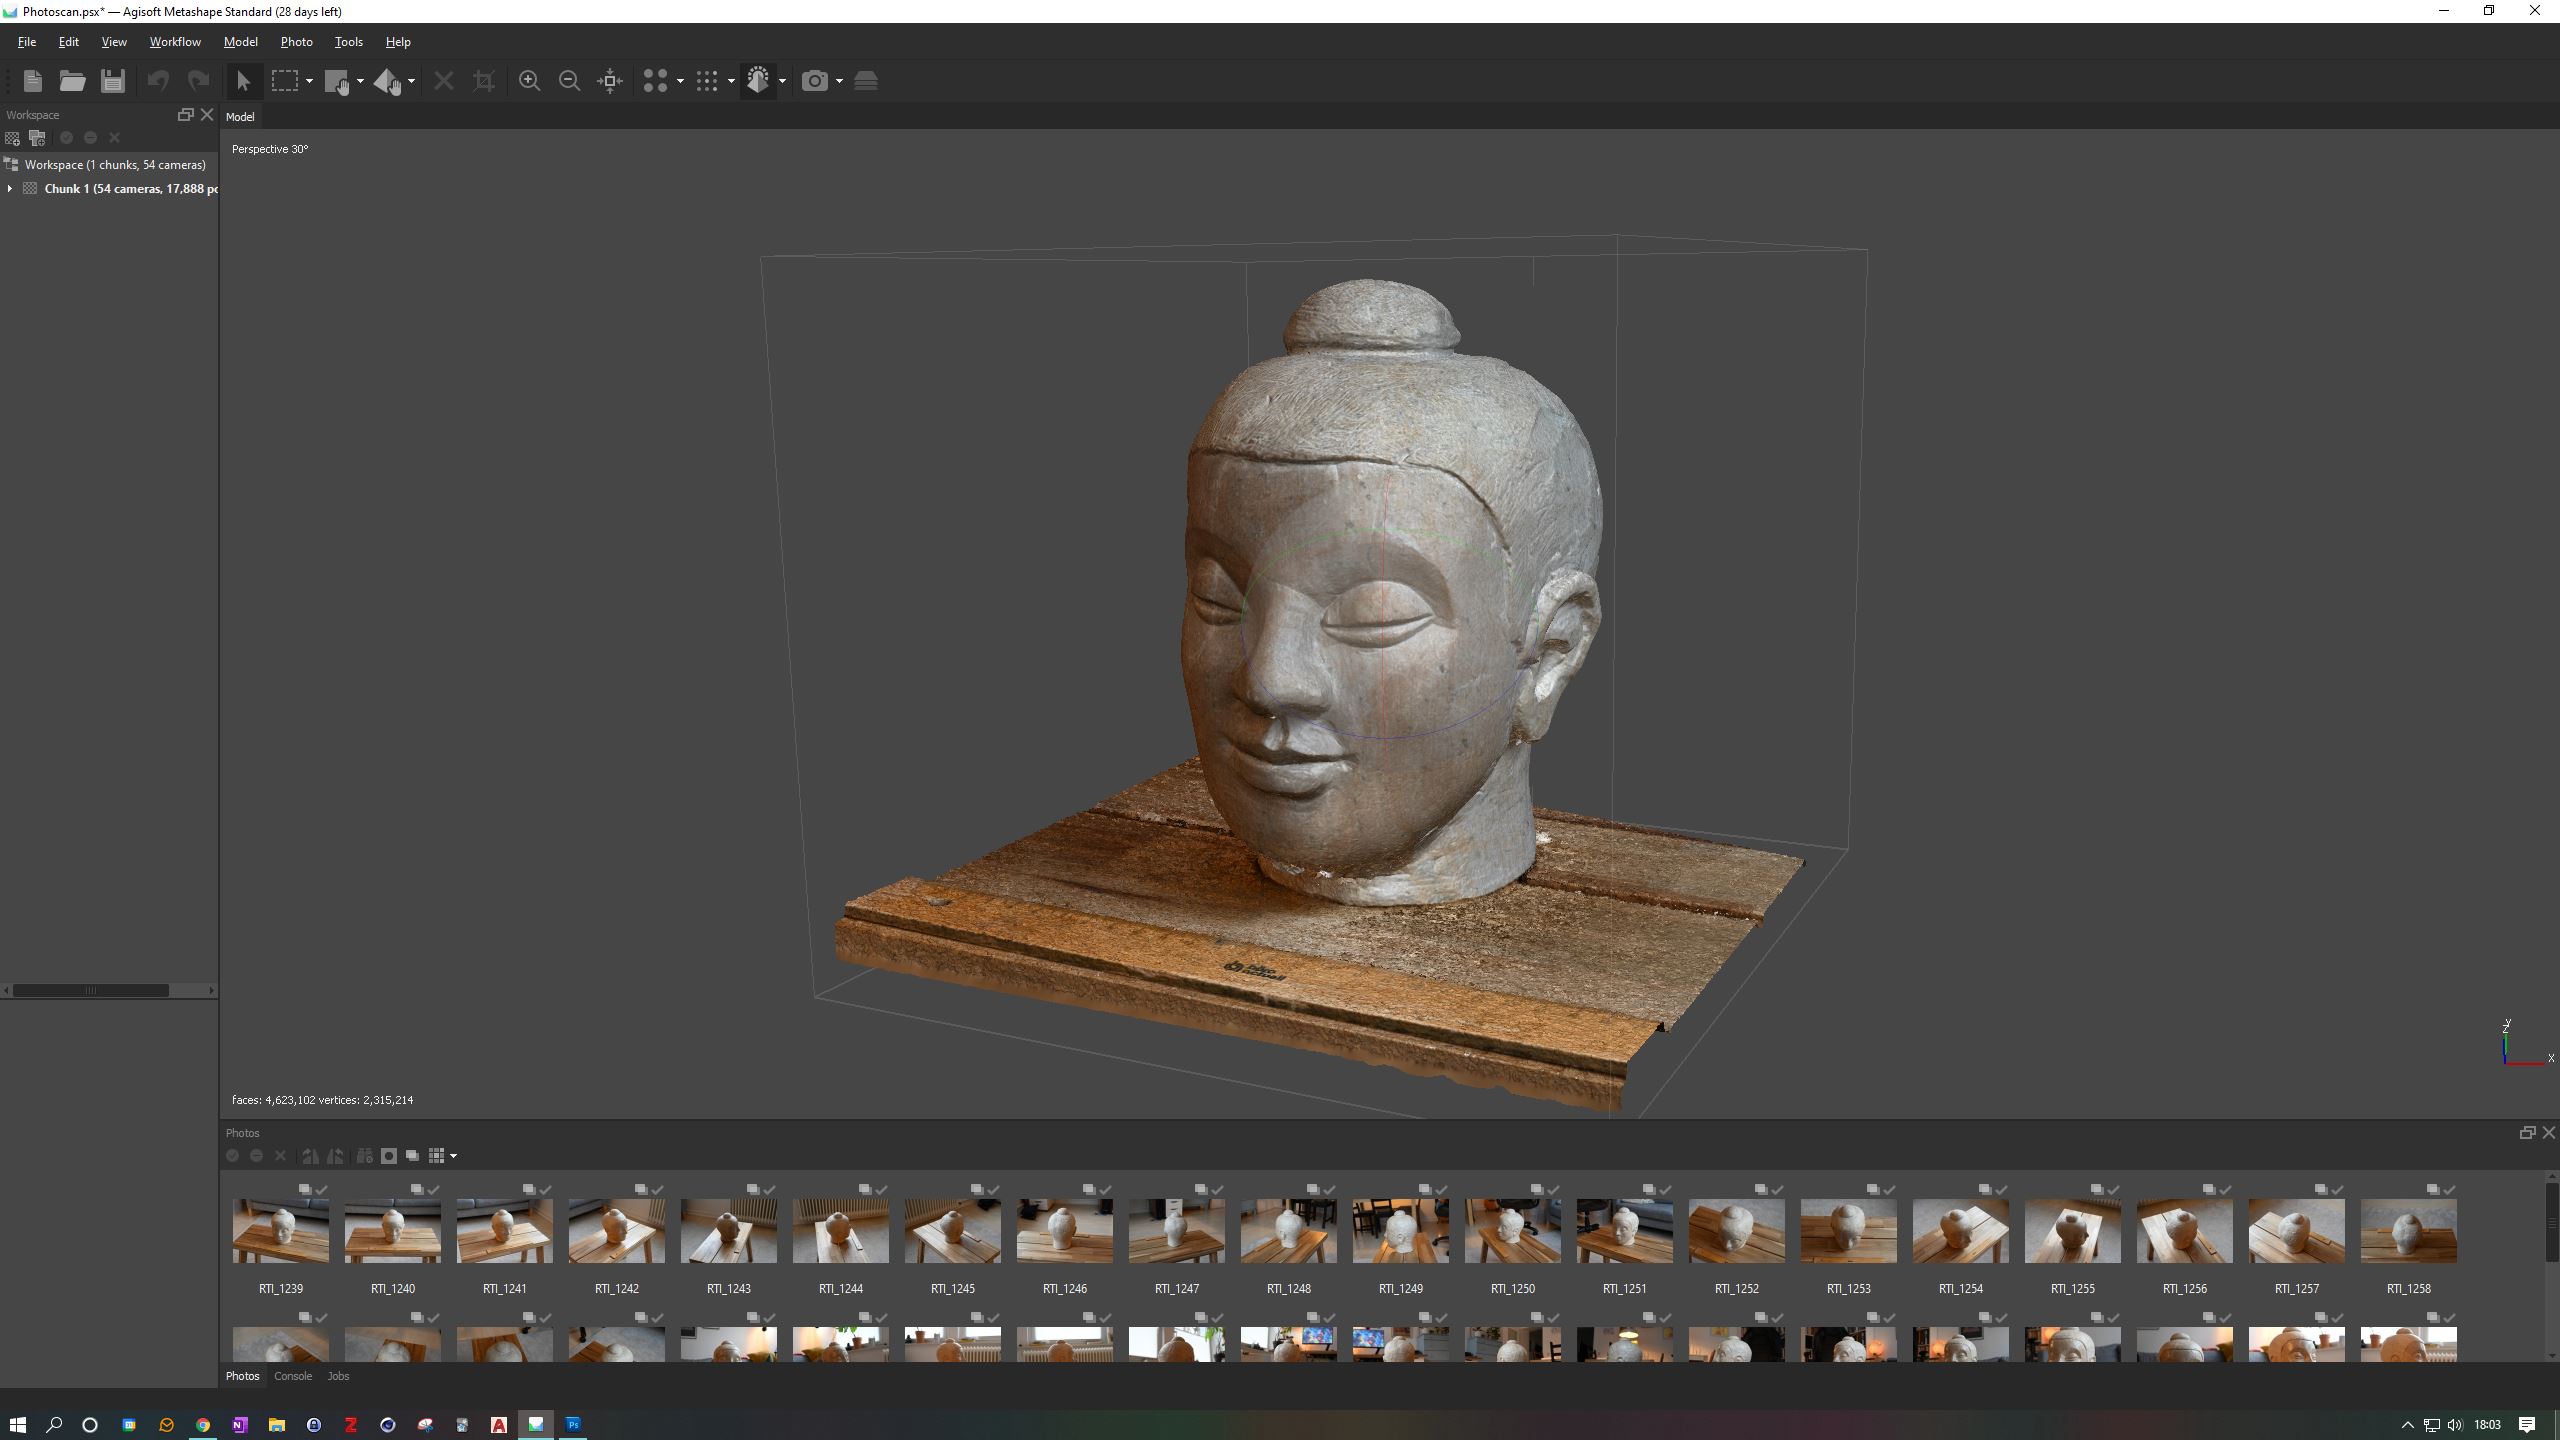
After creating the dense point cloud, your model should look like the image above. If not, make sure the Dense Cloud button is selected. Open the Workflow menu and select Build Mesh.... For this example we will use Arbitrary surface type, Dense Cloud source data and Medium face count. Press the OK button.
Additional information: The Surface Type option helps the software to create the mesh. Arbitrary is used for closed objects such as statues, pottery or buildings. Height Field is used for planar surfaces such as terrain, the facade of a building or bas-reliefs. Here the software does not try to close the object and therefore does not use as much computer power.
The Source data specifies the data on which the mesh is based. You can also build the mesh on the Sparse Point Cloud as this will be much faster. For better results, however, we should rely on the Dense Point Cloud.
The Face count specifies the maximum number of polygons in the final 3D model. The settings High, Medium and Low each correspond to a fraction of the number of points in the previously generated Dense Point Cloud. The higher the value, the finer the 3D model and the longer the calculation time.
In the Advanced settings, the Interpolation setting helps to fill gaps in the model. If interpolation is disabled, gaps in the model will remain gaps in the final 3D data. With this option enabled, the software will fill most gaps using the dense point cloud. Some gaps may remain. The Extrapolated option will produce a gapless model, but the accuracy will not be very high.
Seeing the model
Again, to see the mesh, click on the Model Shaded button to the right of the Dense Cloud button. As you can see, the model is now solid and actually looks coloured. However, the colours are still coming from the point cloud, so we need to take one last step.
Bibliography
- Powlesland, Dominic 2016: “3Di - Enhancing the Record, Extending the Returns, 3D Imaging from Free Range Photography and Its Application during Excavation.” In: The Three Dimensions of Archaeology. Proceedings of the XVII UISPP World Congress (1–7 September 2014, Burgos, Spain), edited by Hans Kamermans, Wieke de Neef, Chiara Piccoli, Axel G. Posluschny, and Roberto Scopigno, 13–32. Volume 7/Sessions A4b and A12. Oxford: Archaeopress.
