Chapter 7: Exporting the model for archiving

If you want to archive your model and your progress, there is something to consider. Of course, you have your 3D model in Metashape and can view it at any time. Unfortunately, that is where Metashape stops. We cannot use this model for other purposes, such as placing it in a 3D scene. It is also possible that you lose your Metashape licence or that the company Agisoft simply ceases to exist. In this case, you'll no longer have access to your model. It is therefore recommended that you export your model in an Open Access file format. This will ensure that future generations have access to your work.
The German Archaeological Institute has a whole page about good and bad 3D file formats. They recommend the X3D, Collada, OBJ and PLY file formats as the best for storing 3D data securely. I personally recommend the OBJ file format as it is the most widely used and therefore compatible file format across platforms and 3D software.
Export the model
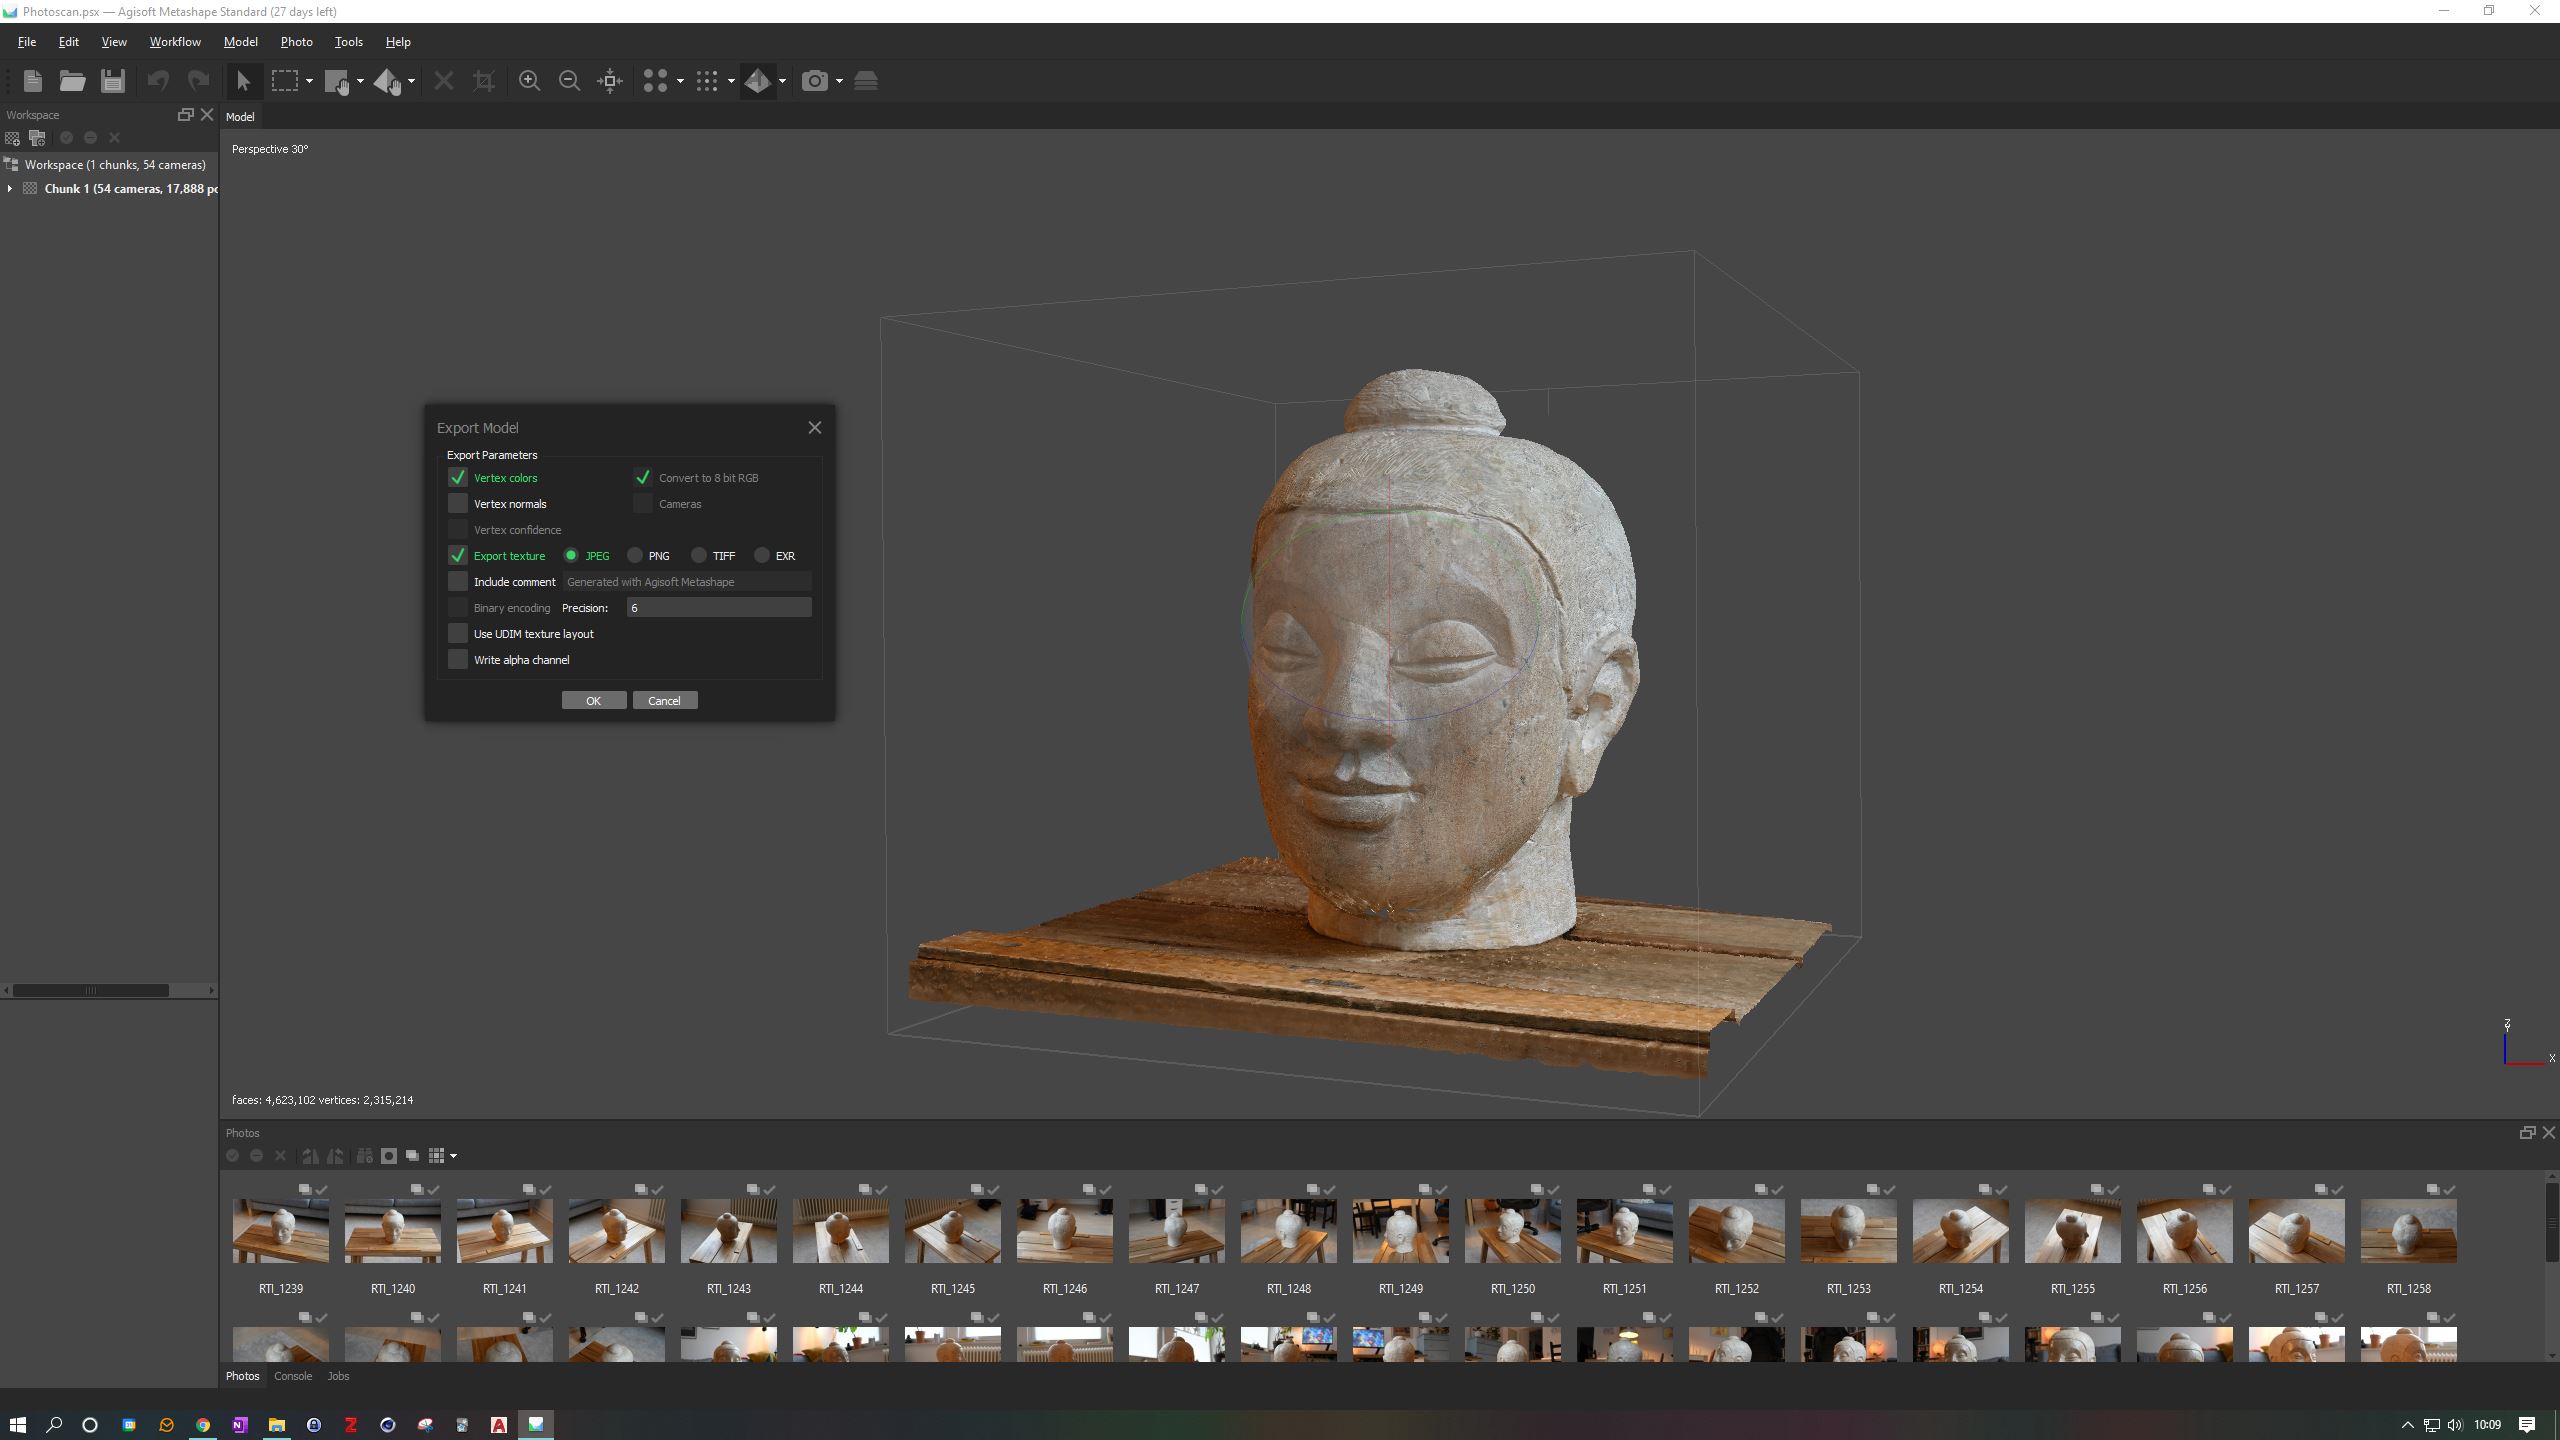
To export your model to OBJ, select the File menu and within the Export submenu select Export Model.... Create a new folder where you want to put the files and give the export a name. You can leave the settings as they are, just make sure that Export Texture is checked and JPG is selected. When archiving for archaeological projects, however, I recommend saving in TIFF format.
When the export is finished, look inside the folder. You should find three files: The texture (JPG), the model (OBJ) and a material settings file (MTL). These files are an exact copy of your model, although the model is still unscaled. If you were using Metashape Pro (which we weren't), you could scale the model within Metashape. This option is not available in the Standard Edition. We therefore need to use a 3D software to do this.
