Chapter 8: Scaling the model
To scale the model without using the Professional Edition of Metashape, we need to use a 3D software to scale the model. I am using Cinema4D here, as this is the same software we use for our 3D Modelling class. Other 3D software will work too, but the process may be a little different.
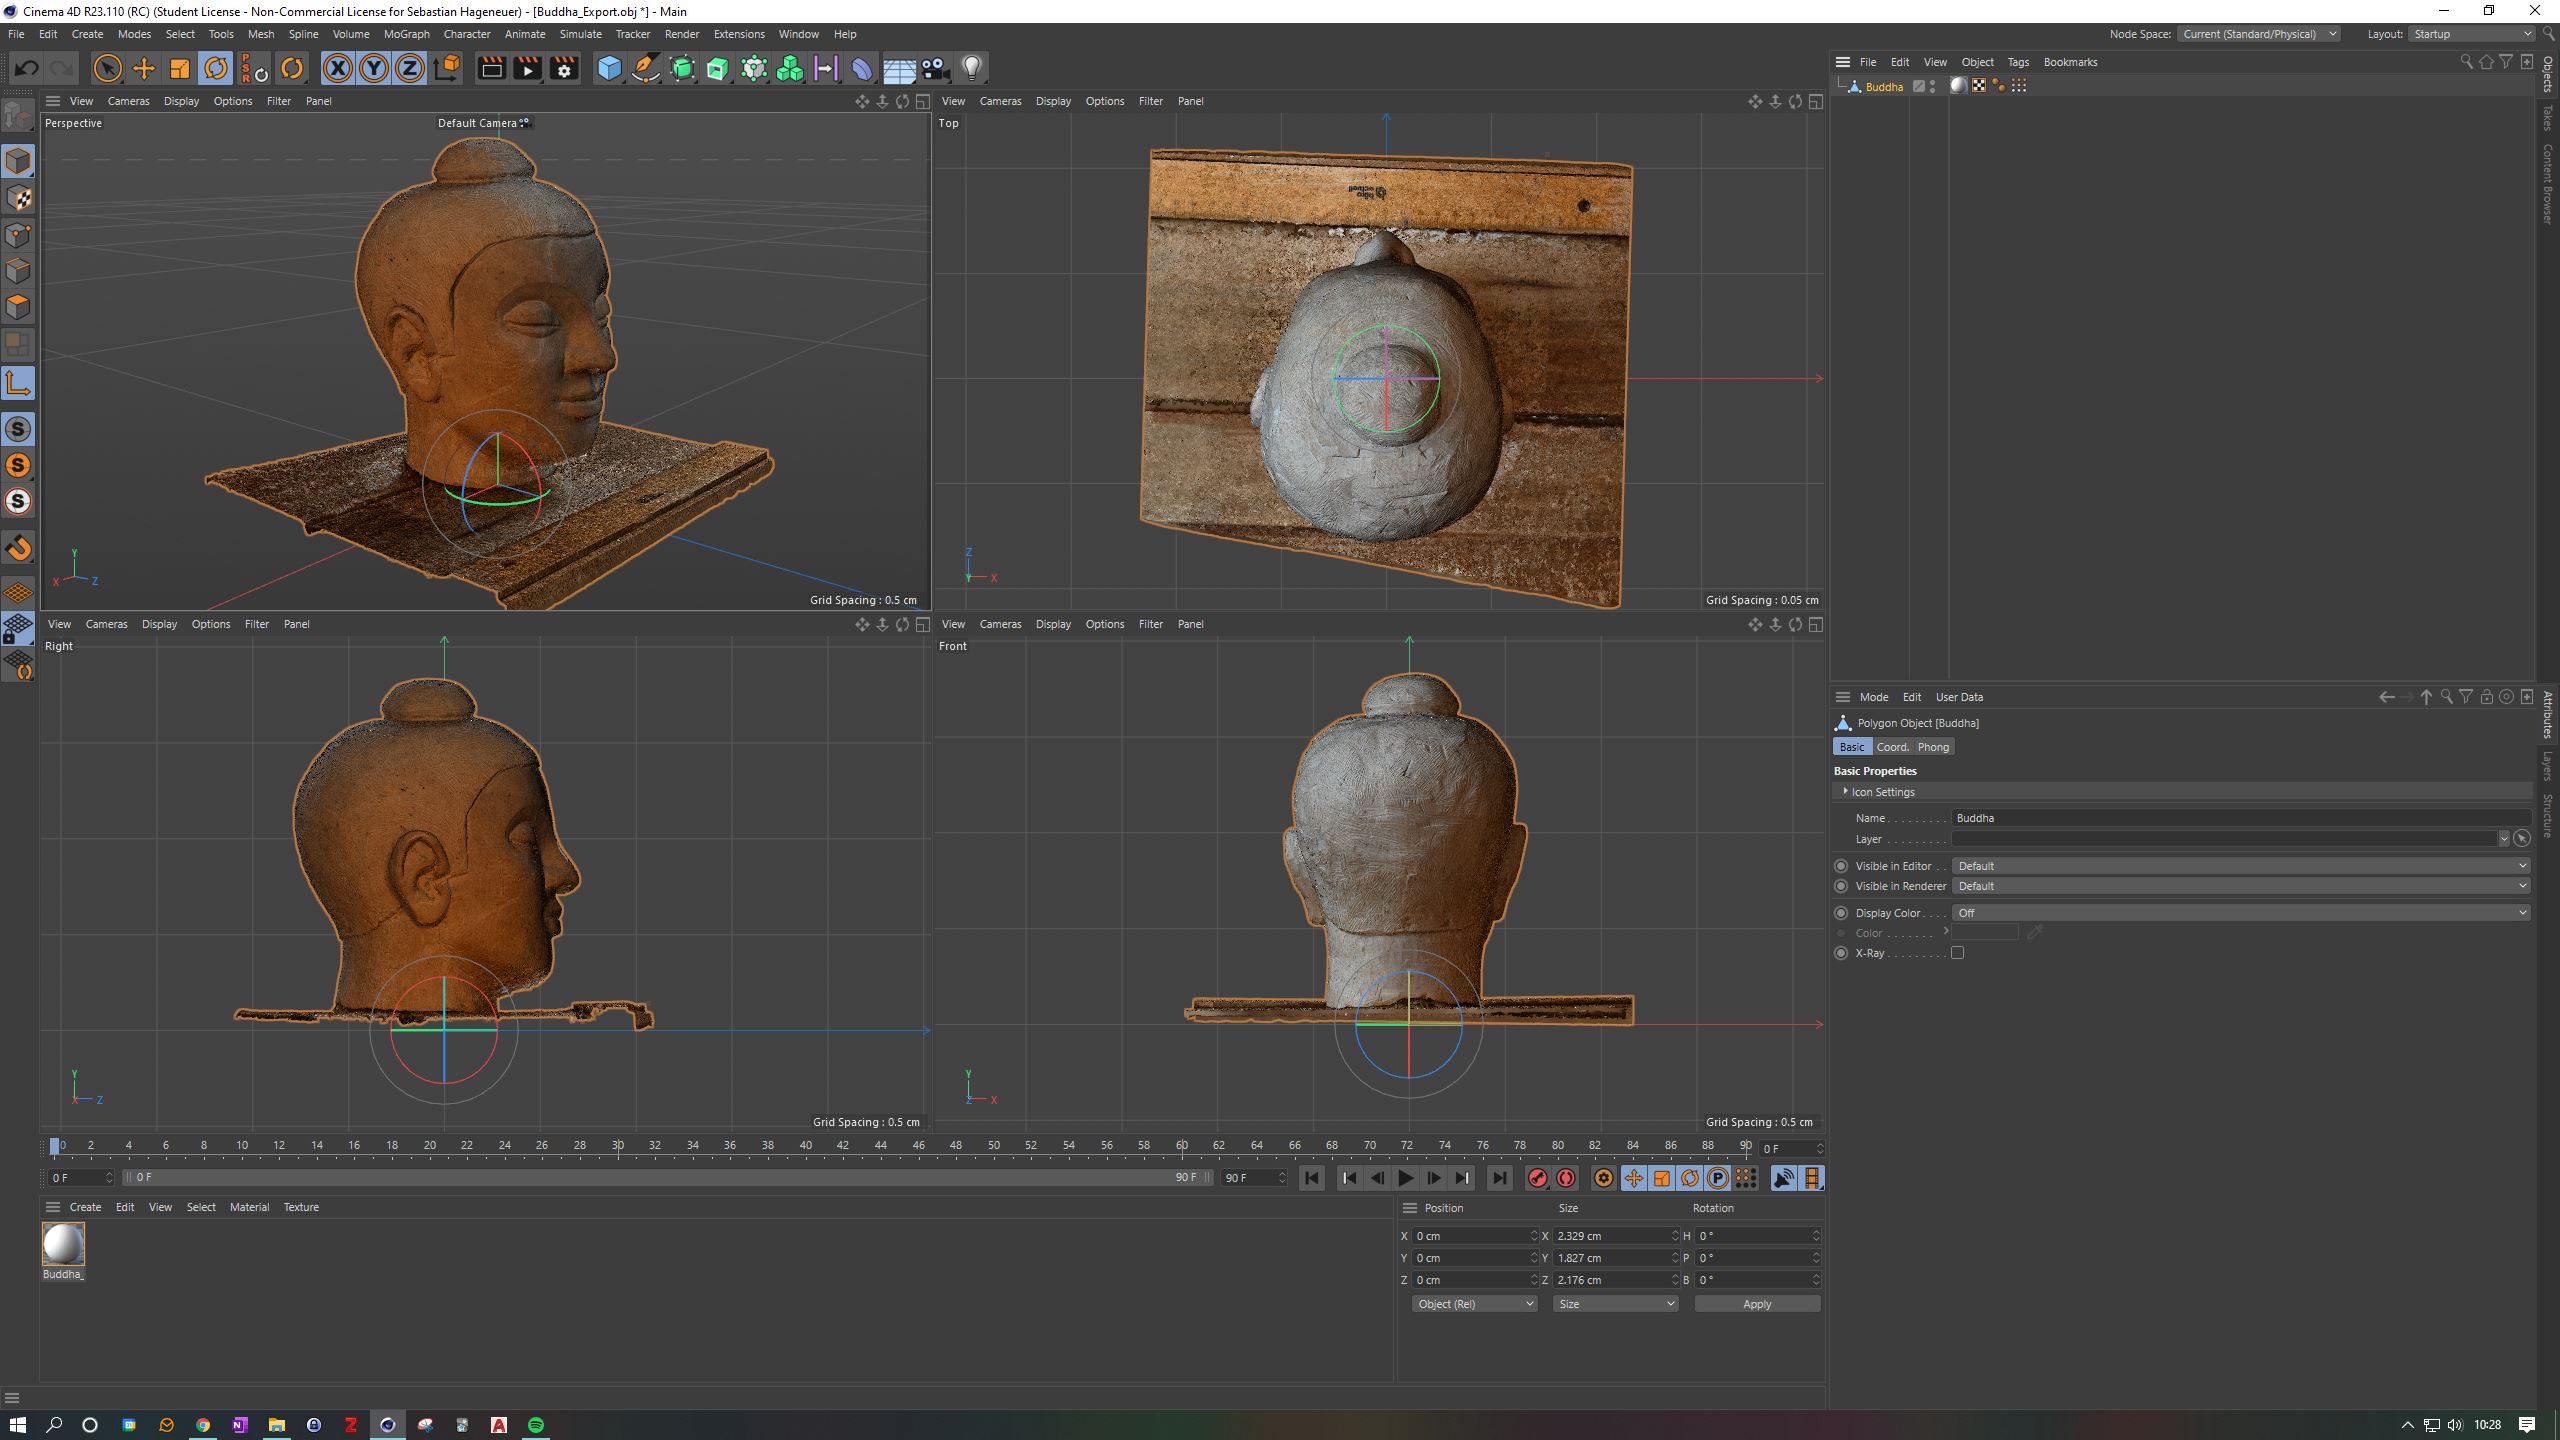
When you open the OBJ file in Cinema4D, you get an import dialogue box. We can leave everything as it is, but make sure you have Import .MTL File in the Material option. Hit OK. The object should appear, although not oriented or scaled. The first thing we do is go to our Material Manager at the bottom and select Edit and Delete unused materials. The second step should be the orientation. We want to level the object in the XZ plane and orient it in the Z direction.
Orienting

First we open the Axis Centre Tool by pressing SHIFT+C and typing "Axis Centre..." to select the tool. A new small window will appear in which we can scale the Y-value to -100% and press Execute. This will place the object's axis at the bottom centre of the object. To centre the object correctly, we need to somehow adjust the direction of the object's axis to the object itself. To do this we need to enable Enable Axis from the left menu. Now in the side and front views (F3 and F4) we rotate the object axis so that the Y axis (green) is aligned with the top of the object. We then open the command line again (Shift+C) and type "PSR" to select the command Reset PSR. This will make the object jump in the right direction. We then alternate between correcting the axis, resetting the axis centre and resetting the PSR. We do this for the side view, then the front view, then the side view again until we are happy. Finally, we orient the top view (F2) so that the front of the object faces the Z axis (blue).
Scaling

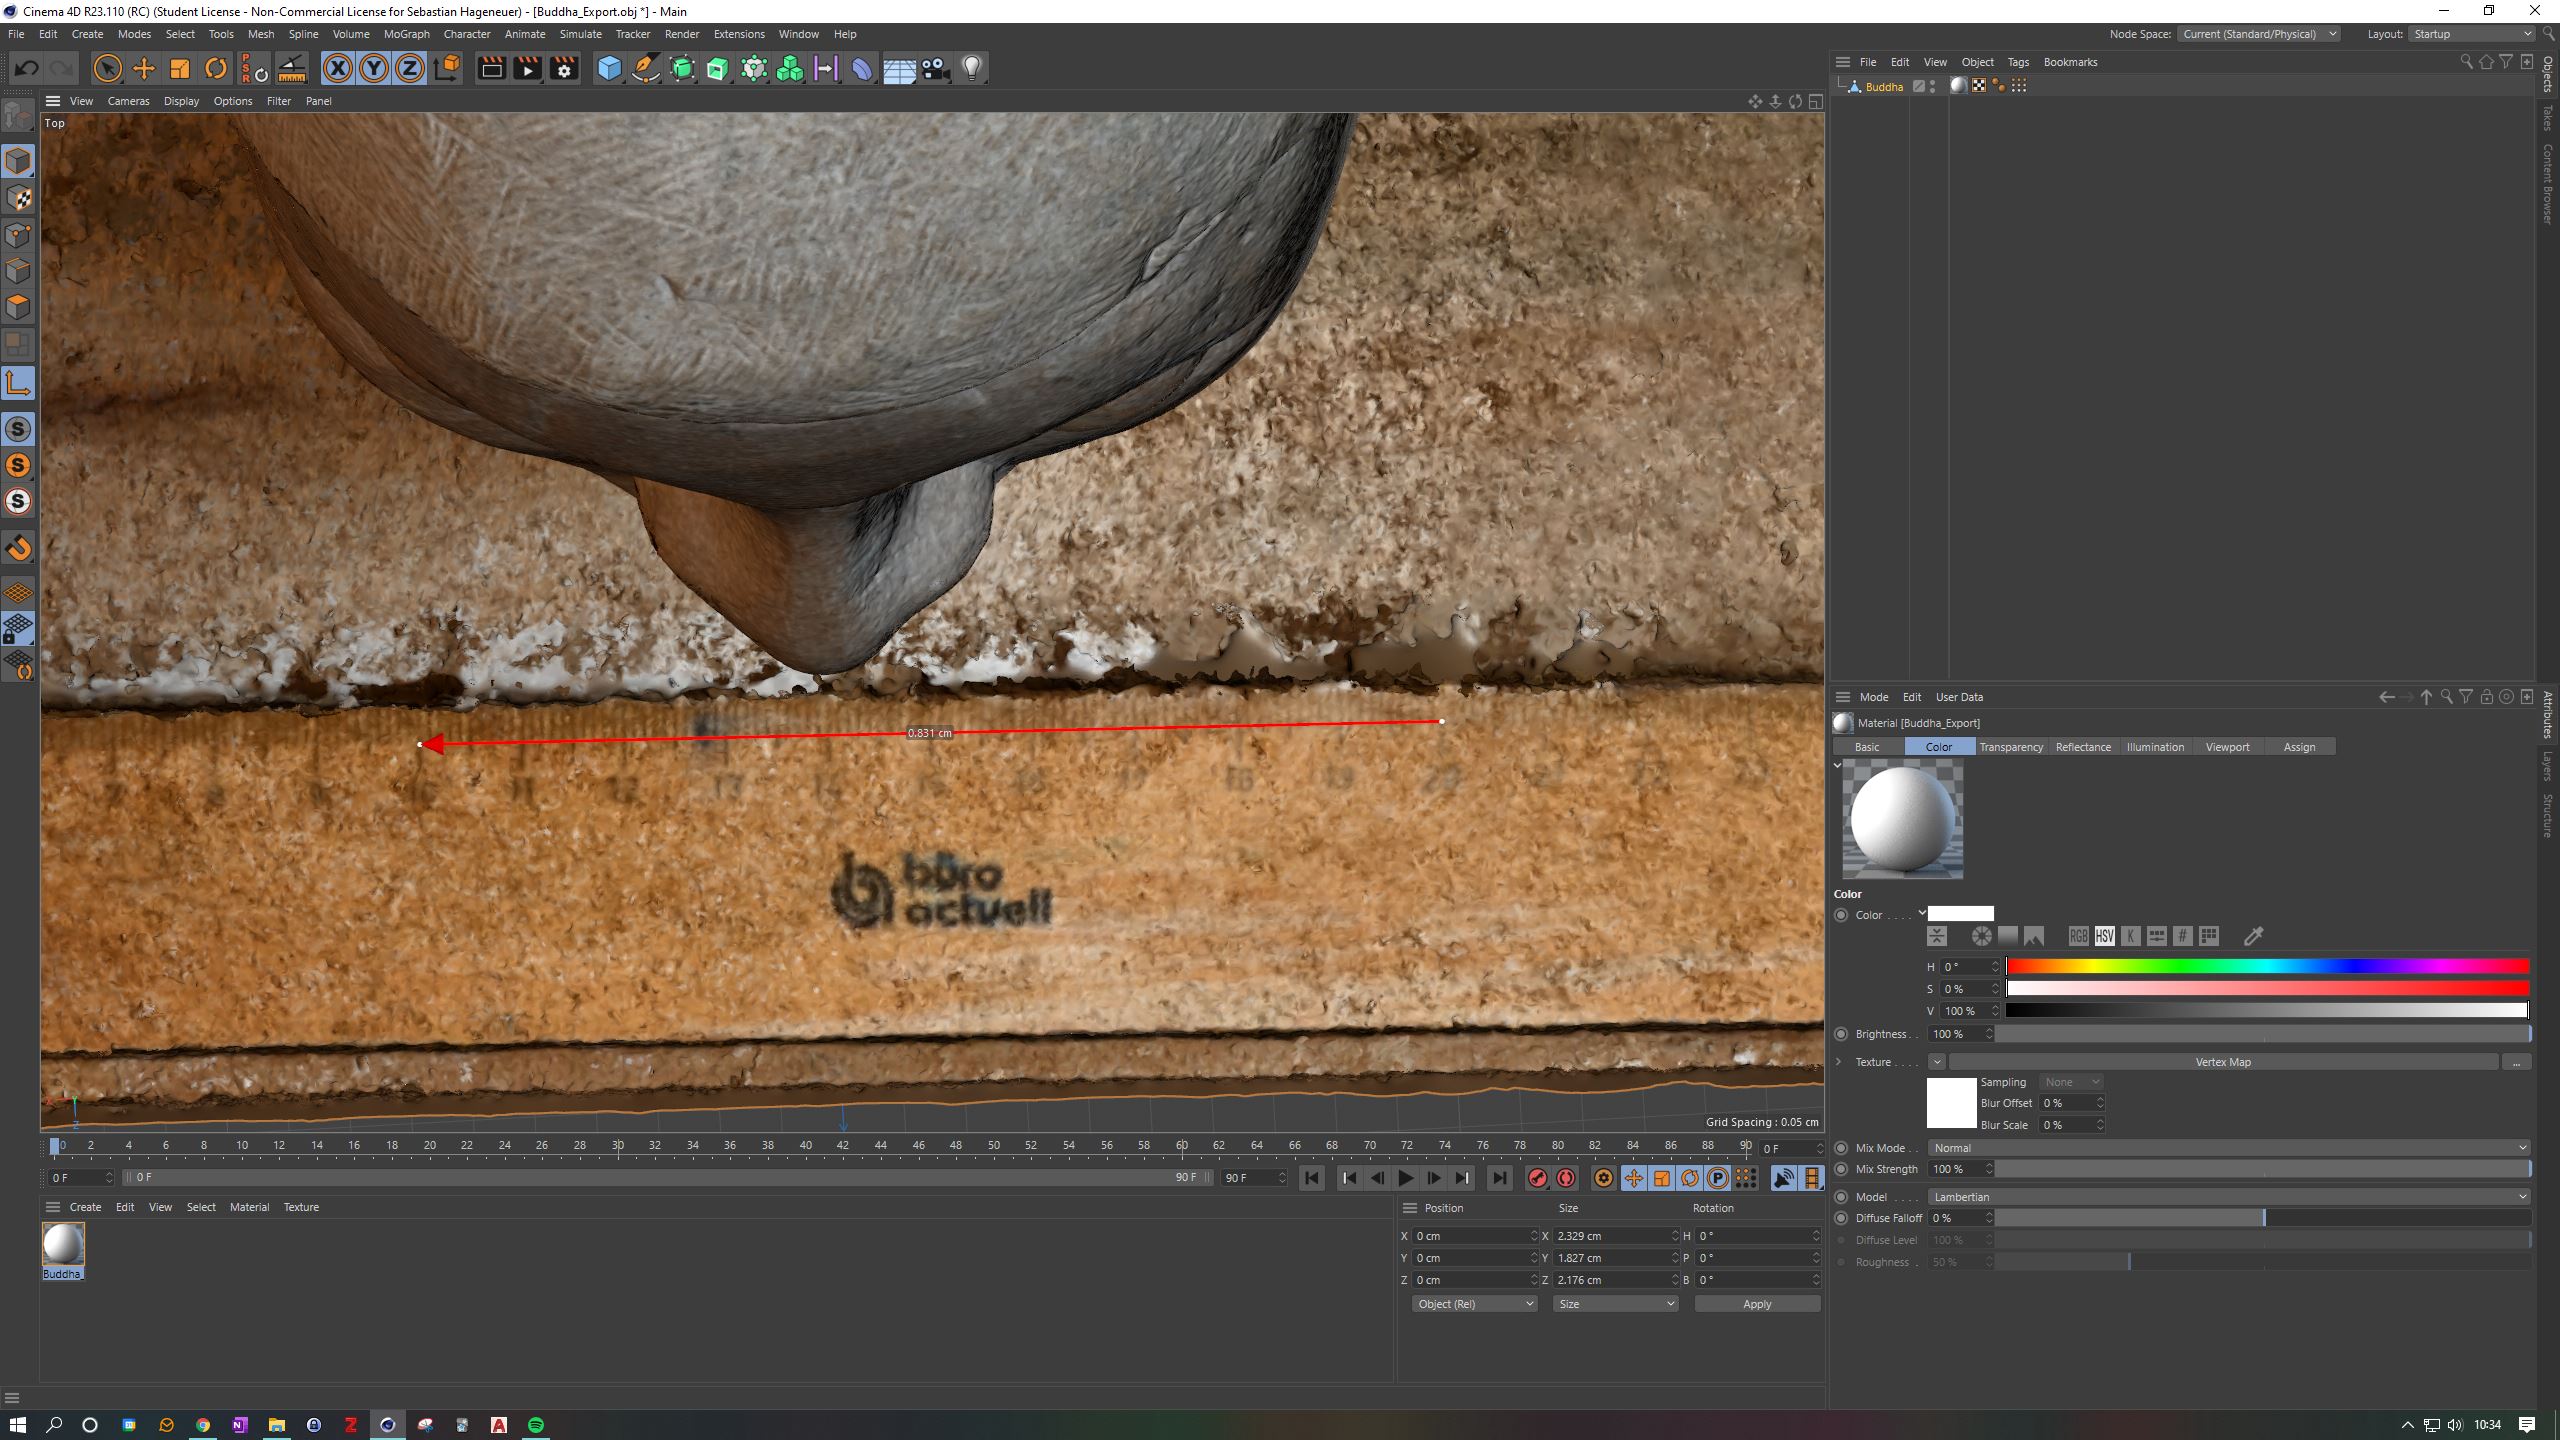
Now that we have the object properly oriented, we can start the scaling process. In order to know how much to scale the object, we first need to know how long a known value is at the moment. Luckily we have some form of measurement built into our model and can measure this. To measure in Cinema 4D, we use the Measure & Construction tool, which we find again via the command line (SHIFT+C). We switch to our top view (F2) and click somewhere on our measurement. We then click & drag the second point of the red line to another point on our measurement, so that we know how long the distance should be. In the screenshot, I have chosen the 10cm and 20cm marks on my ruler, so I know the distance should be 10cm. However, as I can see from the Measure & Construction tool, it is only 0.831cm. So we need to make the model bigger. To calculate how big, we simply divide the 10cm it should be by the 0.831cm it actually is. The result is a factor of 12.034.
With the model selected, we can scale it to this factor by looking at our Coordinate Manager next to the Material Manager. In the middle column we see the size of the object. At the bottom we can change the drop down to Scale. First: Make sure you are not in Enable Axis mode. Just uncheck it in the left menu so that it is no longer blue. Then enter your calculated scaling factor in all three fields of the middle column in the Coordinate Manager and hit Apply. You can zoom out and check the measurements. It usually fits quite well. You can delete the red measure arrow by selecting the Measure & Design tool again via the command line (SHIFT+C) and pressing the Delete Measure button. Your model is now scaled!

