Chapter 9: Combining two clouds into one
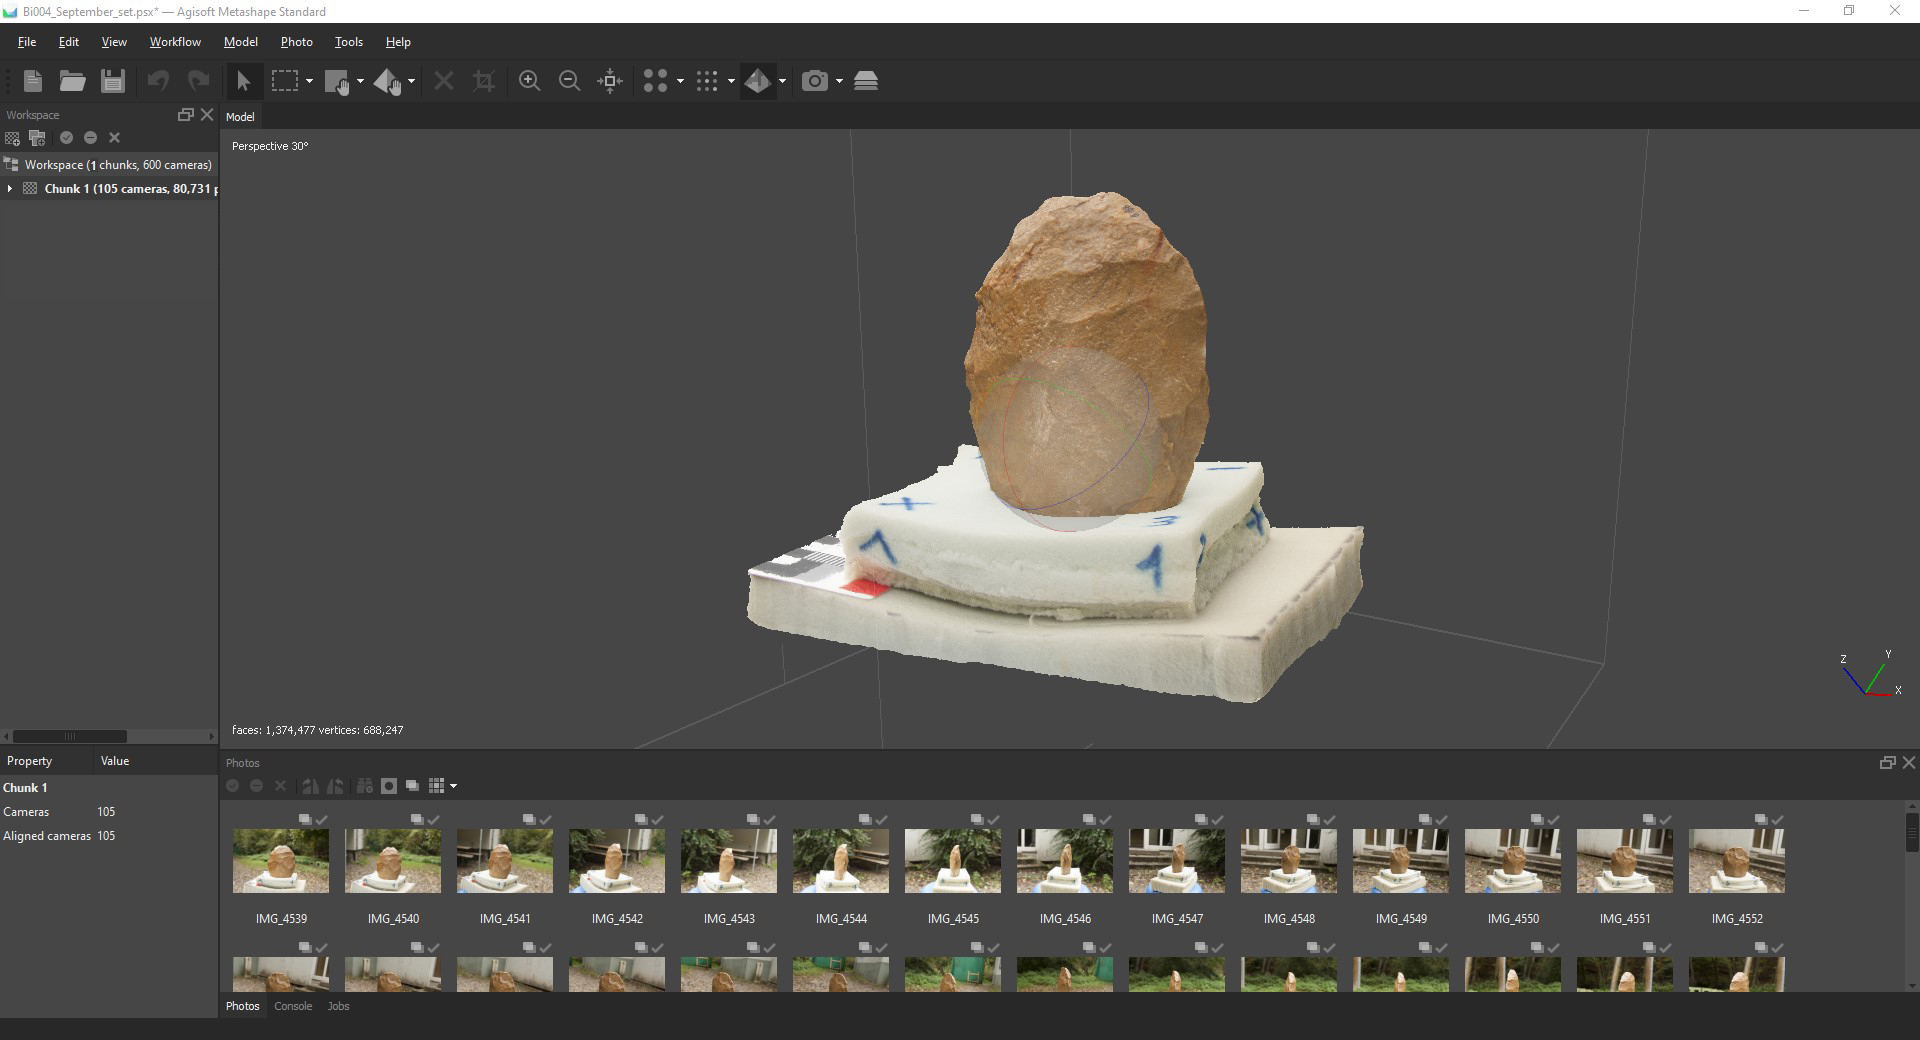
So creating a simple 3D model is not enough for you? Of course we can do more. For example, we could try to create a complete 3D model without the table or whatever the object is placed on. But how do we do that? The first thing you need to know is that you can only really do this with the Professional Edition of Metashape. Rudimentary alignment of two chunks is possible with the standard version, but it is not very good. It is more or less simple and here I will explain how to do it. You should start with a normal 3D model of your object, as you did before. So take a look at this base of a Bi-face on the left. It looks like the objects we made before. Now, if you remember, the first step was to load the photos into the software in something called a chunk. The number of photos was written as cameras next to it, see the screenshot on the side. My example has 105 photos taken from the base of the object.
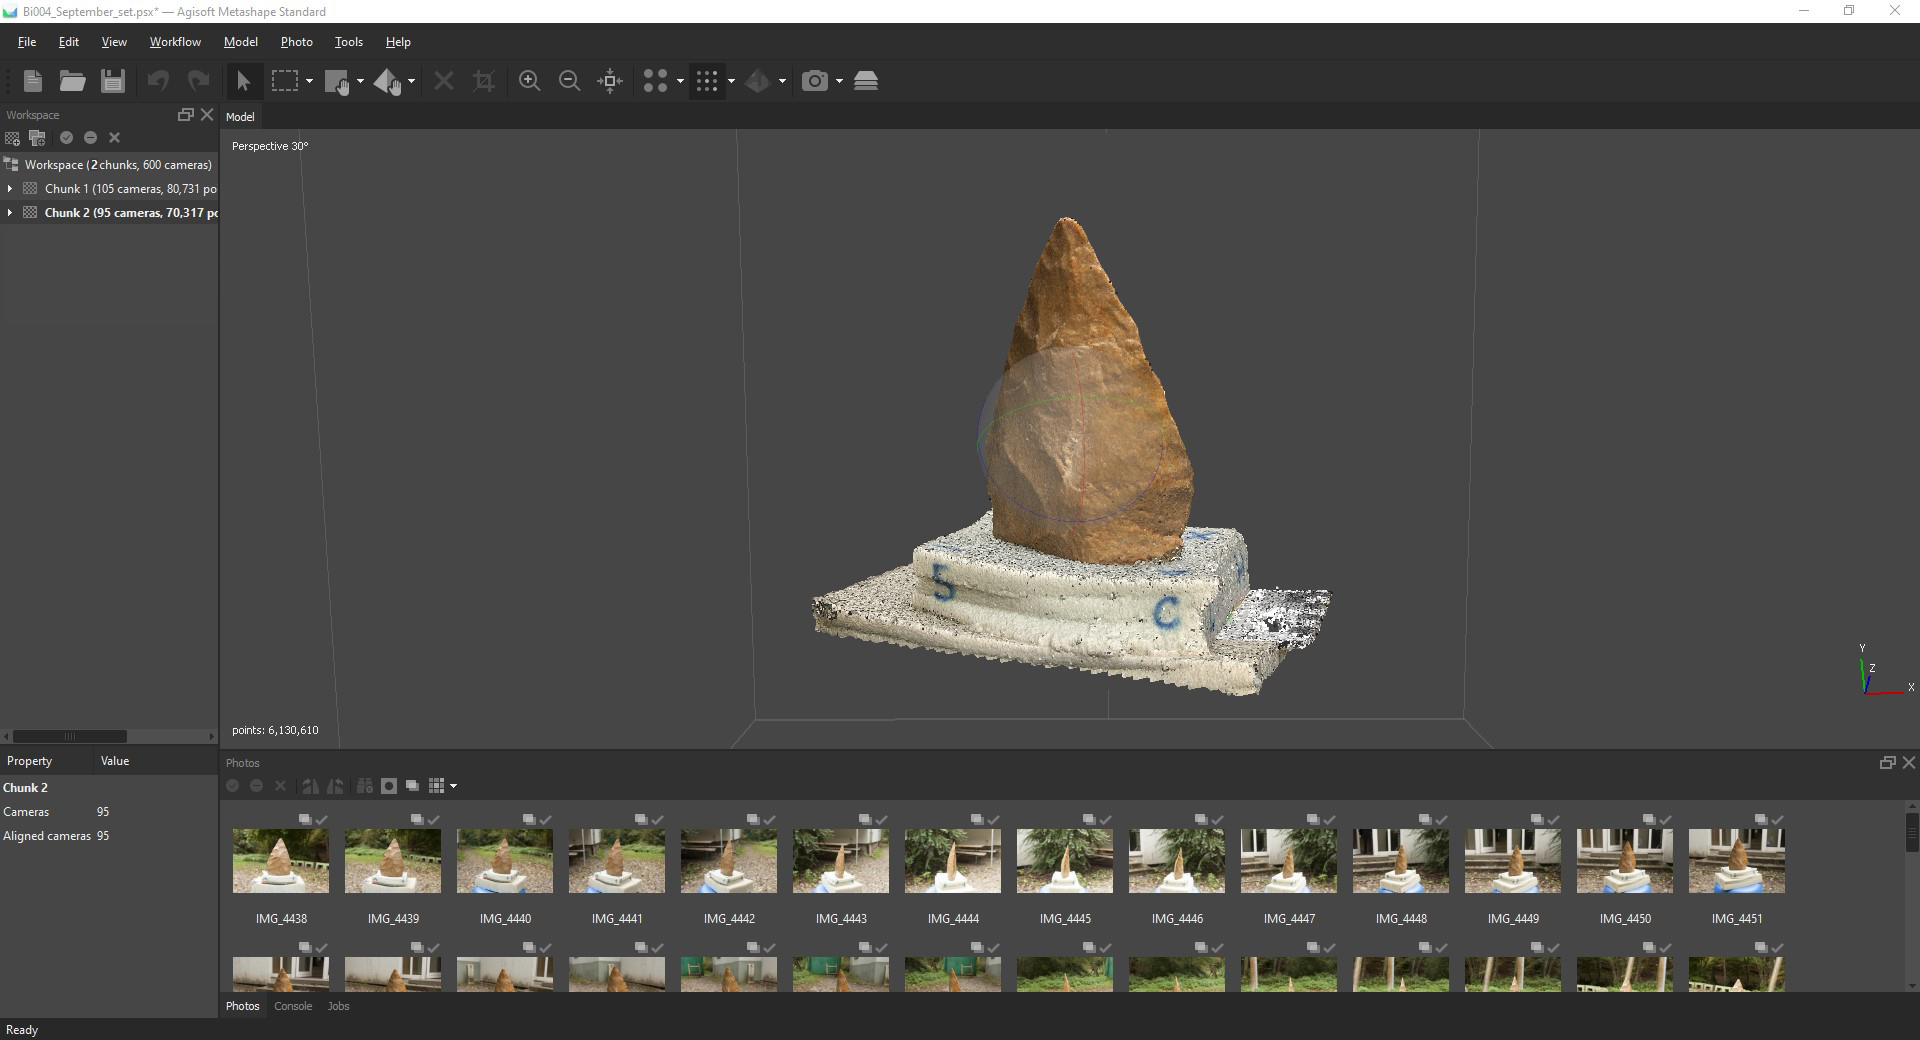
Now let's create another Chunk by clicking on the Create a new Chunk button above the left window. You should now have a Chunk 2 in your list, and you can make it the active chunk by double-clicking on it. Now proceed as before: Add Photos, Align Photos, Build Dense Point Cloud and Build Mesh. But of course you will not take the same photos as before, but new photos from the other side of the object. So in my case that would be the tip of the bi-face.
What I like to do next is make a copy of these two chunks first, because I want to delete a few points and it makes sense to keep a copy of the whole dataset in case something goes wrong. You can make a copy by right-clicking on the active chunk and selecting Duplicate.... You should make a copy of each chunk, so you now have four chunks, two from the base and two from the tip. Then we need to take a closer look. We want to see which parts of our object are the same in both chunks, because the data overlaps and we need that. I like to work in the Dense Point Cloud for this.

By double clicking on our first copy (the base) we can make it active and switch to the Dense Point Cloud view if you have not already done so. What I want to do is have a clear view of the bottom part of my object so that I can select and delete all the other points that I do not need. When done, it should look something like this screenshot. See the clean cut I made? There is still a lot of overlap with the other chunk, but I have got rid of all the unnecessary bits. Now let's move on to our second copy, the tip of the object.

Here we do the same. First we navigate to get a good view and then we delete all the points we don't need. The good thing is that we are working with copies of the chunks. So if something goes wrong, we can start again because we still have the original chunks. Once you have prepared the second chunk, we can try a first rudimentary alignment. By clicking on Workflow/Align Chunks... you can select the chunks to align. Leave the originals alone and just select your copies. You can also check the Adjust Scales checkbox and press OK. Let's see what Metashape has done.
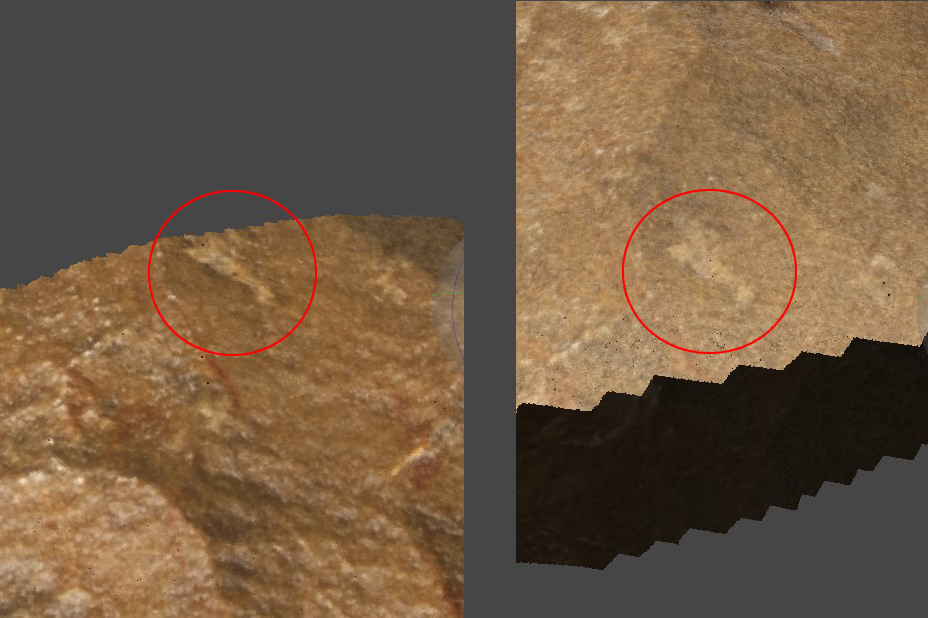
Sometimes this alignment works. Metashape tries to figure out how these two chunks fit together. It looks for labels that match in both point clouds. Most of the time it will not work at all. Don't worry, that's what markers are for. If you look for some interesting points on the objects yourself, you will probably find some spots or cracks or whatever that are visible in both chunks. Look at the example on the side. The red circles mark the same spot that is visible in both chunks.
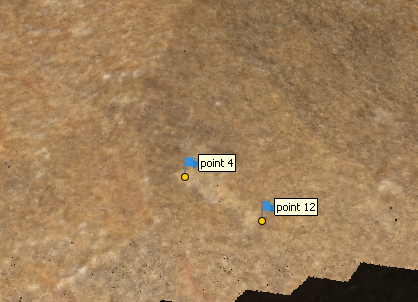
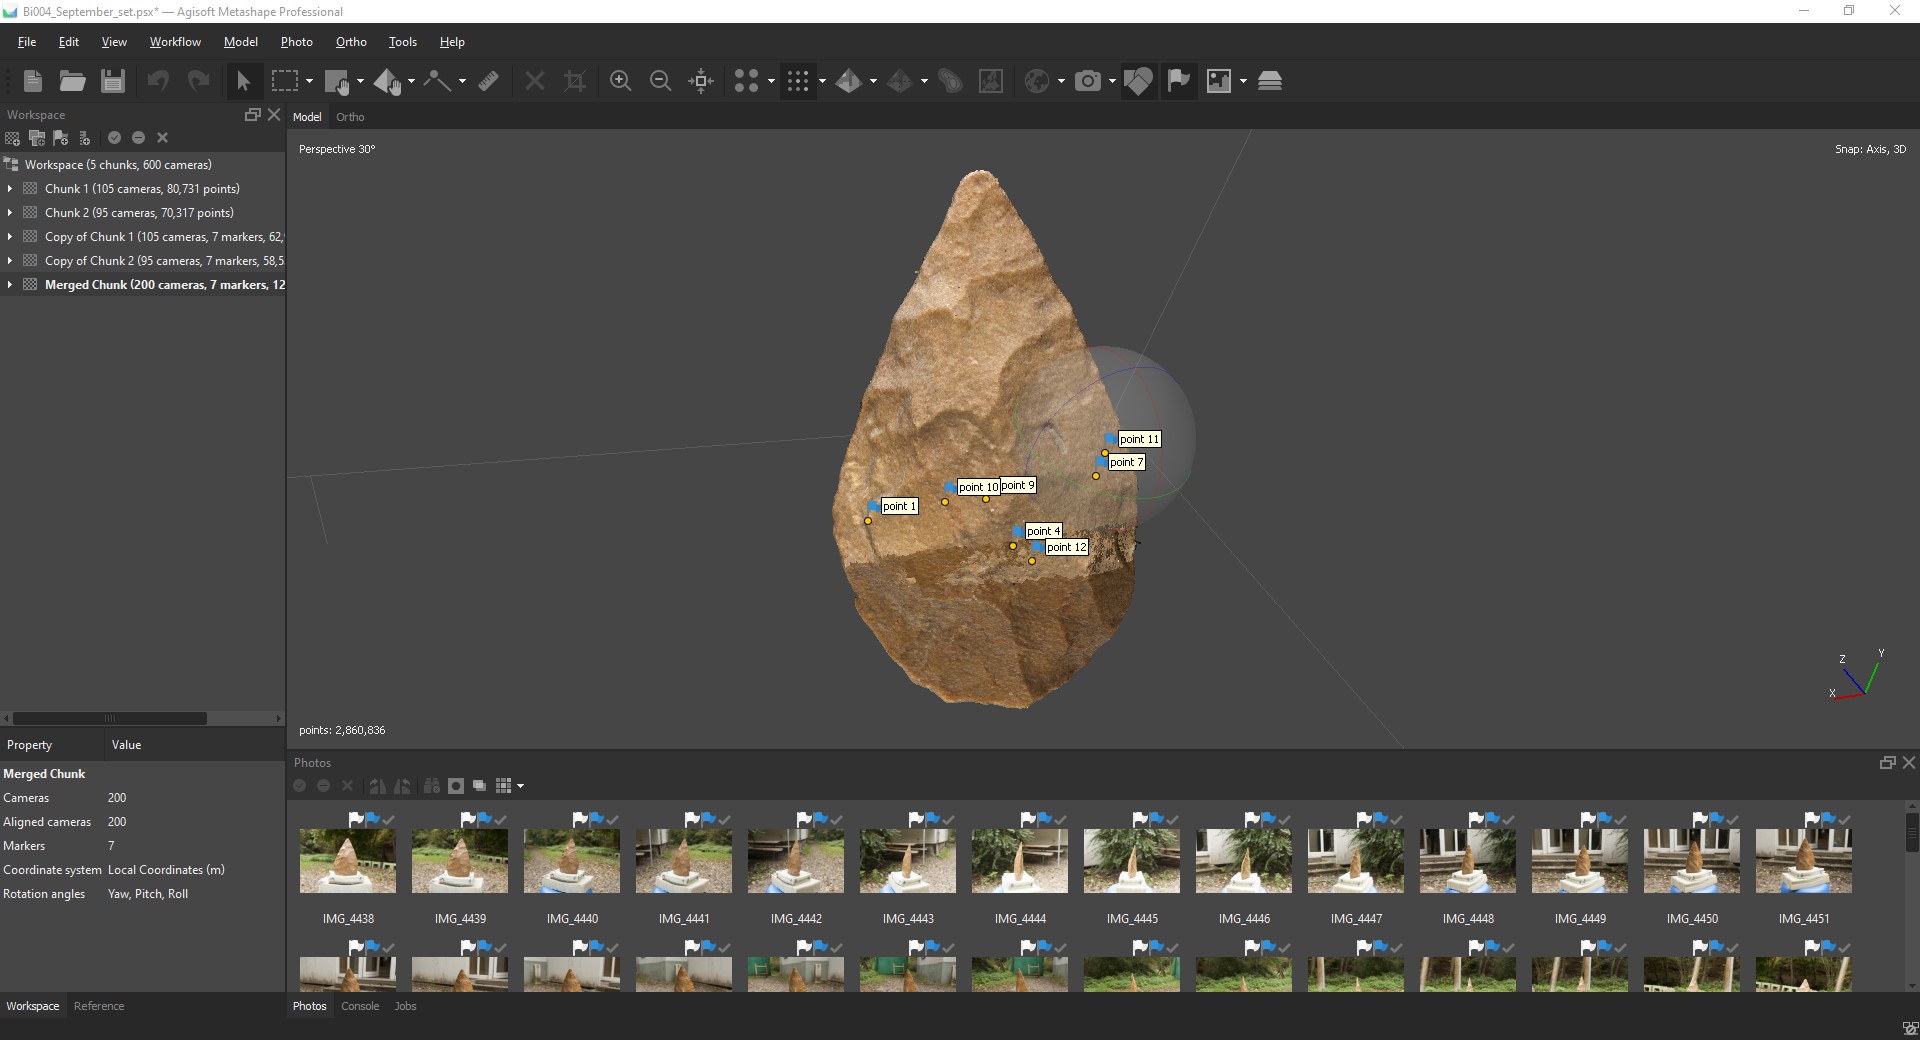
Now, by right-clicking on certain spots of this feature, we can add so-called markers. Find a spot that you see in both chunks and give it the same marker (i.e. the same marker number). In my case, I gave the upper part of this spot the marker 4, and came around a bit later to give the lower part of this spot the marker 12. If you can't see the markers (or want to turn them off later), you can use the little flag icon on the top row of tools. Just make sure that the marker numbers are the same in both chunks. So keep going back and forth. Try to find as many markers as possible. Sometimes this is easy, sometimes it is hard. 12-20 points is enough. Now we can do the alignment much better. By clicking on Workflow/Align Chunks... again, we can restart the process. This time make sure the method is set to Marker based. When the process is finished you won't see much at first, but if you switch between the two chunks you should see that they are aligned and positioned relative to each other. Great!
However, we still want to have a single chunk so that we can create a single 3D object. To do this we select Workflow/Merge Chunks.... Here we select the two chunks we just aligned and make sure Merge dense clouds is selected as well as Merge markers. When we hit OK Metashape will create another chunk, this time combined. We now have a dense point cloud of the whole object. We only have to do the meshing and texturing part again, but you already know how to do that. Happy meshing!
